


Blog

Featured Posts
  1. 5 Sustainable Building Materials You Need to Know
    5 Sustainable Building Materials You Need to Know
    Sustainable goals include improving the way people live and build while creating a lower impact on the environment and the ability for future generations to meet their own needs in times to come. Sound too good to be true? If you are in the construction industry, you know it’s a very real thing called sustainable building. More than just a trend, the sustainable building offers environmental, economic, and social benefits making it something that will become an integral part of the industry as a whole. These factors help in governing the building design, quality of architecture, technologies and processes, working conditions, and serve as the basis for sustainable construction. The construction itself focuses on seven core principles throughout the building life-cycle which are protecting nature, reducing the consumption of resources, reusing resources, using recyclable resources, eliminating toxins, applying life-cycle costing, and an emphasis on quality. Some key best practices in green building have quickly taken over, as well as green materials that will help further define sustainable construction in the future.

    The Future Is Green

    Construction materials made from scratch not only require a lot of energy but can create waste in the process. In order to reduce this footprint, using low-impact green building materials that are sourced from renewable sources with the ability to be recycled when the building has reached its lifespan is so important. Often green building materials are either produced via an innovative process that lower harmful emissions into the atmosphere or sourced from sustainable forests.

    Here are five sustainable building materials to know:

    1. Photoluminescent Exit Signs

    Photoluminescent technology is currently one of the only non-electric, non-radioactive options on the market for approved emergency exit signs, making it a top choice for sustainable construction and buildings emergency exit signage. Options like Jessup’s UL924 listed PF100 photoluminescent exit sign and PM100 photoluminescent exit sign are not only easy to install and maintenance free, but they are recyclable and last up to 25 years without using any electricity. During a blackout or fire, the stored energy in the photoluminescent sign will make it immediately start to glow to allow people to be safely guided to the nearest exit. As with all of Jessup Manufacturing GloBrite® exit signs, the PM100 and PF100 are tested to glow a minimum of 90 minutes in a power outage or when the lights go out when fully charged. Photoluminescent emergency exit signs use phosphor as their main ingredient, which has properties to absorb, store, and then emit light at a later time when previously exposed to light. Photoluminescent exit signs act like a sponge by absorbing and holding light energy, and then will slowly release it when needed over an extended period of time. This allows photoluminescent exit signs to be an excellent green building material product that is hassle-free and safe.

    Other facts to know about photoluminescent exit signs:

    • Builders can earn points towards LEED certification (Leadership in Energy and Environmental Design) — the most widely used green building rating system in the world, by choosing photoluminescent exit signs and exit path markings.
    • Numerous U.S. building codes already require photoluminescent exit markings and signage.
    • According to Energy Star, if your building replaced 100 LED exit signs with eco-friendly photoluminescent exit signs, you would be looking at an energy cost savings of over $450 a year.
    • When choosing a photoluminescent exit sign make sure it is UL 924 Emergency Lighting and Power Equipment listed by UL, meets NFPA Life Safety Code 101, OSHA requirements and International Building and Fire Code 2009, 2012, 2015, 2018

    2. Bamboo

    Bamboo has got to be one of the most well-known green building material products on the market and for good reason. With the species able to regenerate at an exponential rate (in some cases 3 feet in 24 hours) and the fact that it can take a beating without needing to be replaced very often, it makes for a viable flooring or cabinet choice in buildings and can also contribute towards the allocation of LEED points for builders. Bamboo also takes less energy to transport than other comparable durable materials on the market due to its lightweight nature. However, it has been known to swell and even crack if it absorbs water and should never be installed without treatment to resist insects and rot. The fact that bamboo offers greater compressive strength than brick or concrete, looks beautiful, and is a rapidly renewable material makes it an excellent choice for a sustainable building material.

    3. Cork

    Similar to bamboo, cork is another quickly growing resource that builders can take advantage of when it comes to various parts of their construction process. Being extremely flexible and resilient, it makes for great floor tiles. Cork’s natural ability to absorb noise and shock make it an excellent green choice for insulation and sub-flooring. Another interesting fact about cork is when left uncoated, it is naturally fire resistant and does not release any toxic gases if burned. Because cork is primarily found in the Mediterranean does mean that shipping fees can become considerable. Luckily, cork is lightweight— meaning it takes less energy to ship it, and often this can offset the shipping fees. Cork does not rot or absorb water like bamboo but will become brittle over time.

    4. Recycled metal

    What’s old is new again. By taking metals like steel and aluminum and properly and efficiently reusing or recycling them into new products, it lowers their embodied energy, thus making them more sustainable. A metal like steel is endlessly recyclable (in fact it is North America’s #1 recycled material), nontoxic to humans or the environment, and uses relatively low energy to produce initially. Thanks to advances in manufacturing technology, the energy to produce raw steel has dropped 60% since 1960. Metals like this offer a strong, long-lasting, water, and pest resistant product in your building process. This makes metal an excellent choice for structural supports, building facades, and roofing. Additionally, check out the ways manufacturers are making steel even more sustainable:
    • Reusing the by-product gases from the furnaces as they are a direct fuel substitute.
    • Recapturing and cleaning CO2 by-products to make carbonated drinks.
    • Using electric arc furnaces for steel production which utilize 100% scrap metal. This means less energy than producing new steel.

    5. Precast concrete slabs

    Concrete is a natural choice for sustainable home construction. Limestone, the most abundant mineral on earth, is the predominant raw material found in concrete. Precast concrete slabs are generally produced via eco-friendly manufacturing processes offsite and then shipped in whole sections to the construction site. The outer layers usually envelop a lightweight filler, like foam insulation, or can be made entirely of concrete but have large, hollow air spaces, like concrete blocks. Even though it is heavy, it requires very little processing and can be produced in the specific quantities needed for each project, making its embodied energy noteworthy. Precast concrete slabs’ sustainability factor is even higher than many traditional poured concrete options because the slabs often take much less energy to produce and assemble. Because they are in a controlled environment, precast concrete also has the ability to cure in a controlled environment. Concrete poured on site is prone to improper curing which can lead to cracks and structural faults within the concrete and in some cases the need to demolish the concrete and start the entire process over again. Precast concrete slabs hold up to all kinds of weather, so they are commonly used for walls, building facades, and even floors and flat roofs. Concrete is also extremely energy efficient, so homes and buildings built with them enjoy a significant cut to their heating and cooling bills, plus require small-capacity HVAC equipment. As a highly affordable building material, the ability to be recycled, and energy efficiencies precast concrete slabs are worth considering for your next building project. Thanks to the increasing demand for green developments, eco-friendly building materials are becoming the standard. From photoluminescent exit signs to reclaimed metal, using sustainable building materials allow you to build structures with a lower carbon footprint and improved energy efficiency, all while saving costs, increasing quality and improving efficiencies in the construction process. Actively work with your city and state to implement sustainable practices in building and as an organization seek LEED certification. Also, understand who you are working with when you buy your products. If the producer and fabricator don’t follow strict procedures regarding reuse, waste disposal, and other key operations, the above materials are moot- so vet your vendor and their sources carefully. The shift to sustainability won’t happen overnight, but through proper research, innovation, and participation from stakeholders, it will move forward to help future generations.
  2. Biggest Slip and Fall Stories in the News
    Biggest Slip and Fall Stories in the News
    Slip and fall lawsuits are unfortunately all too common throughout the United States. While some are scams, many of them are very real as slip and falls are the number one cause of accidental injury, resulting in 20.8 percent of all emergency room visits. We are looking at several top slip and fall lawsuits making headlines that have been ongoing for years and are still waiting on judgments. Which way do you think they’ll go? Could they have been prevented with different slip and fall precautionary measures put in place?

    Case 1: Woman Suing McDonald’s Over Slip and Fall

    A woman claims she was injured after she allegedly slipped and fell on wet floors at a McDonald's in O’Fallon, Illinois. She filed a complaint on May 13, alleging negligence. In the suit, it states that she was a guest at the McDonald's on April 7 when she was allegedly injured due to a dangerous condition that had been left to exist. She claims she slipped and fell on wet floors, causing her to suffer severe and permanent injuries. The plaintiff alleges the defendants failed to provide adequate warnings of the condition, failed to provide adequate and safe egress for guests on the property to maneuver and move about, and negligently permitted the presence of a condition causing unreasonable risk of harm. The plaintiff is seeking relief of more than $50,000. Our Restaurant Slip and Fall Prevention Tips: Nearly all restaurants have floor safety procedures in place, but whether they’re followed appropriately is another thing. Restaurants are commonly top offenders for slip and fall accidents so having your staff knowledgeable on the importance of these safety measures and trained on implementing them is important. Other best practices for preventing slip and fall accidents in restaurants include:
      • Slip-Resistant Flooring: With the floors of restaurants are constantly being hit with beverages, grease, or spilled food, the texture of your floors is very important. Having flooring that is slip-resistant will help with the daily hustle, including patrons and employees moving about.
    • Anti-Slip Film: Having an anti-slip film that is mop-friendly like our Safety Track 3500 Resilient Medium Grade anti-slip film is also helpful to have around beverage areas, sinks and in bathrooms to further help in preventing slip and fall accidents.
    • Use mats and rugs, but with caution: Mats and rugs are great to offer prevention, but if not properly maintained, they can actually be the cause of these accidents. Replace old and frayed rugs immediately, make sure they are not curling at the corners, and use a mat that either has a high-traction backing or put an anti-slip tape underneath it to prevent movement, such as those certified by the NFSI.

    Case 2: Slip and Fall Case Against Target Seeking $1.2 million Remanded Back to State Court

    On May 20, the U.S. District Court for the Eastern District of Pennsylvania determined Target took too long to remove the plaintiff's slip-and-fall case to a federal court and granted her motion to remand it back to state court. The plaintiff sued Target in a Philadelphia County Court back in November 2018, saying she suffered injuries after she fell in a Target in 2017. She asked for more than $50,000, plus legal costs and delay damages. Target was served Dec. 24, 2018, and had until March 12 to respond. The plaintiff then followed up with a Case Management Conference memorandum that consisted of a demand for $1.2 million on March 4. On March 12, Target removed the case to federal court but filed the notice of removal after the allotted 30 days, causing the court to grant the plaintiff's motion. The plaintiff said she slipped on what she described as a “liquid” substance on the floor of a Target store and “suffered a cosmetic disfigurement and she may continue to suffer (the) same for an indefinite time in the future," according to the ruling.

    Our Retail Slip and Fall Prevention Tips: In retail stores, especially large ones like Target, it can be challenging to keep track of every nook and crannies in the store to make sure spills are promptly cleaned. It is important to make sure employees are doing rounds and alerting appropriate team members if liquids are spilled, so they can have signage put up immediately and take care of the potential hazard. Beyond that, additional products and practices that can help in preventing slip and fall accidents in retail include:

      • Keep your space clean. Cluttered floors, clothes off hangers, or boxes of unpacked merchandise on the floor are top offenders of trip and fall accidents in retail. Make sure employees keep areas tidy and at the end of their shift, organize the spaces for which they are responsible.
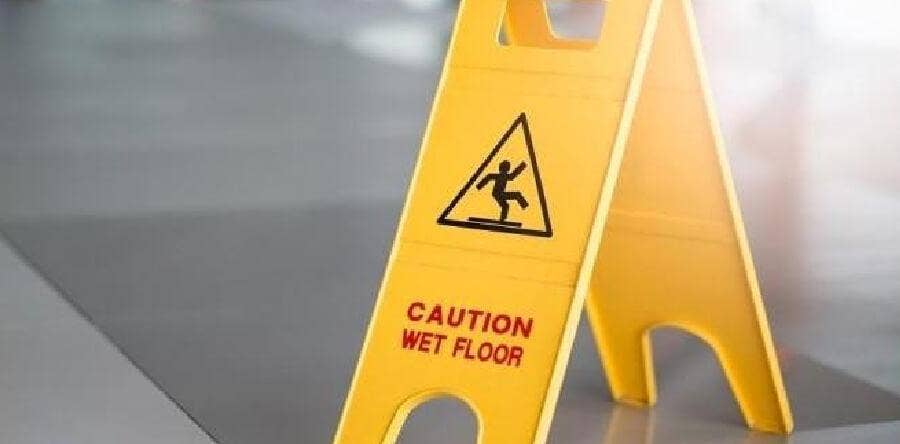
    • Proper products matter. Having the right products easily accessible plays a crucial role in preventing slip and fall accidents in retail stores. Providing wet floor signs, clean up supplies like paper towels and mops in a convenient location that all employees are aware of is important. Also, consider using a slip-resistant floor cleaner to further prevent any accidents from occurring.
    • If you have an uneven floor that changes in height, it is a good idea to use either a caution sign, caution tape or have railings in place. Always make sure to use a non-slip film in these areas because it is commonplace for a fall.

    Case 3: Vacationer Alleges Slip and Fall on Carnival Cruise Ship

    A vacationer alleges that he was injured aboard a Carnival cruise ship is suing the well-known cruise ship company. The plaintiff filed a complaint April 26 in U.S. District Court for the Southern District of Florida against Carnival Corporation, alleging negligence. The plaintiff alleges on Feb. 26, 2018, he was caused to slip and fall shortly after boarding the Carnival Inspiration. The fall occurred, the suit says, when Barrios went to the wrong muster station, causing the Carnival employee to lead the plaintiff to the correct one. The plaintiff further alleges he was holding the arm of his travel companion who was being pulled by the Carnival employee and the plaintiff fell on the stairs, resulting in injuries to his spine and causing him to lose enjoyment of life. Carnival filed an answer to the plaintiff’s allegations of negligence, arguing that Barrios' action was precluded in the plaintiff’s ticket. The defendant also alleged that they were not responsible for the plaintiff’s injury. The court has agreed with the plaintiff and decided to strike affirmative defenses two and seven, as stated by Carnival. The court believes the defendant's second defense impermissibly seeks to preclude the plaintiff’s ability to bring forth a negligence claim, which the defendant is not allowed to do. The seventh defense seeks to shift the blame for the incident to a third party, which is not permitted under general maritime law. The plaintiff asked that the defendant’s second and seventh defenses be struck. U.S. District Judge Federico A. Moreno heard the case. Our Cruise Ship Slip and Fall Prevention Tips: Unfortunately, wet surfaces make up 55% of all slip, trips, and falls in the hospitality industry and when on a cruise ship, it’s going to be wet sometime, somewhere during your stay onboard. That is one reason why cruise ships have to take extra precautionary measures to keep both employees and patrons safe. We have compiled a list of the top areas slip and fall accidents commonly occur on the cruise ship and what can be done to prevent them and protect those aboard.
    • Heavy-duty grit tapes need to be used. Grit tapes can withstand the elements the ocean brings aboard and should be used throughout the ship deck, on ramps, within dining quarters, bathrooms, and stair treads.
    • Wear proper footwear. Employees should all be required to wear slip-resistant shoes, and guests should be strongly encouraged to do the same. Having that extra traction can make a big difference if you hit a wet spot while walking.
    • Make sure you have adequate lighting. Dimly lit spaces are just waiting for accidents. With many of the ship-goers unfamiliar with the boat, it is especially important for cruise ships to have adequate lighting, especially in hallways, ramps, and in stairwells.
    As a business owner, it is essential to take precautionary measures and train your staff to know the right steps to take if a person on your property says they had a slip and fall accident. With more than 8.7 million people injured from a slip, trip and fall incidents every year in the United States, the threat is a very real one that could occur in your building, especially if you don’t take proper measures to prevent them. Contact our team at Jessup to discuss how we can help you assess your building and help you with slip and fall prevention.
  3. What You Need to Know About Photoluminescent Emergency Signage for Passenger Rail Cars
    What You Need to Know About Photoluminescent Emergency Signage for Passenger Rail Cars
    The American Public Transit Association (APTA) is known as the leader in advancing public transportation and setting the standards in creating public transportation that is available, accessible, and safe for all Americans in communities across the country. APTA has specific safety standards when it comes to all areas of public transportation, including bus, paratransit, light rail, commuter rail, subways, waterborne passenger services, and high-speed rail. This week we are taking time to help you navigate the specific photoluminescent emergency signage safety requirements for passenger rail cars. Photoluminescent emergency signage is now a requirement in all passenger rail equipment. It is important to have the correct photoluminescent product in its correct placement because when a rail car loses its power, this emergency signage will be the visible light to guide those on the train to safety.

    F.A.Q. on Photoluminescent Materials Used For Emergency Signage:

    What is photoluminescent material? Phosphor is the main ingredient found in photoluminescent materials, including photoluminescent emergency signage. Phosphor can absorb, store, and emit light at a later time when it is exposed beforehand to light. APTA states that photoluminescent material (which they call PL throughout their readings) is material that has the property of emitting light that continues for a length of time after excitation by visible or invisible light has been removed (i.e., self-illuminating).
    What is high-performance photoluminescent (HPPL) material? Throughout APTA's Passenger Rail Equipment Safety Standards when discussing photoluminescent safety signage, it references using high-performance photoluminescent material (HPPL). This is a photoluminescent material that is capable of emitting light at a very high rate and for an extended period of time. To meet HPPL standards, the material must have a minimum luminance value of 7.5 millicandelas per square meter (7.5 mcd/m2), for 1.5 hours after removal of the charging light source. Unless otherwise permitted in standard SS-PS-002-98, Rev. 3, the charging light source is specified as a fluorescent lamp with a color temperature of 4000-4500°K that provides an illuminance of no more than 1 fc on the test sample for a duration of no more than 1 hour. We know this may sound confusing. To make it simple, when looking for a photoluminescent material for your passenger rail emergency signage, be sure to check that the product meets their specific safety standards APTA SS-PS-002-98 (Rev.3) and APTA SS-PS-004-99 (Rev.2), like our Glo Brite® 7812 APTA compliant material. How can you ensure your HPPL system is getting adequately charged to perform when needed? To make sure your photoluminescent safety signage is ready to perform, your normal lighting system (i.e., light fixtures), needs to be located in the proximity of each HPPL component and oriented to ensure that the HPPL material is adequately exposed to charging light, according to APTA Safety Standards. These light fixtures located in the proximity of each HPPL system need to be specified so that their light-dispersion patterns provide the minimum illuminance levels at the surface of the component (check table located in section 2. 4.2 for details)

    Where should you apply photoluminescent emergency signage in passenger rail cars?

    APTA safety standards designate several areas that high-performance photoluminescent material should be used and how it should be applied. It is important to follow their requirements to ensure the safety of all employees and guests onboard. Location 1: Door Exit Handles, Latches or Operating Buttons All door exit handles, latches, or operating buttons should be marked with high-performance photoluminescent material using one of the following methods:
    • Outline stripping that is no less than 1 inch (2.54 cm) wide to the extent practicable around the perimeter of the opening device;
    • Area-wide pad that is applied to the door or door frame directly behind the handle or latch with no less than 16 square inches (103 cm2).
    Also, each door should be equipped with a separate manual override device for a power-operated door intended for emergency egress and should be marked with a sign/marking containing the words "Emergency Door Release," "Manual Door Release," or other similar wording. These signs or markings need to be placed at the manual door control or at an appropriate location in its immediate proximity. If it is not obvious where the manual release device is located relative to the door handle, latch or operating button, then a door emergency release locator sign needs to be posted. The manual door release locator sign(s) or marking(s) should consist of brief text, graphic arrow(s), or symbol(s) to direct passengers and crew members from the door control to the location of the manual door release. Location 2: Vestibule, End-Frame, and Side Doors Leading to the Exterior of the Car and Intended for Emergency Egress Passenger rail transit cars ordered on or after the adoption of these standards need to have HPPL material and follow these requirements:
    • Mark side door exit locations without independently powered emergency lighting.
    • Each side door opening intended for emergency egress leading to the exterior of the car shall be marked with a minimum of 144 square inches (929 cm2) of HPPL material placed no higher than 18 inches (45.7 cm) off the floor, with its lowest point no higher than 6 inches (15.2 cm) off the floor. This marking may be comprised of one or more panels placed either on the door and/or in its immediate vicinity. A door with two leaves that open for emergency egress is considered a single door opening. So, 144 square inches (930 cm2) of HPPL material is sufficient for that door opening.
    • To provide some illumination at the floor for passengers and crew members as they exit, to the extent practical, the material should not be placed on a door leaf/panel that is intended to open for emergency egress or on the part of a wall or partition that would be covered by a door leaf/panel in any position.
    • Signs and markings used to comply with the low-level egress path marking (LLEPM) requirements contained in the APTA Standard Rail Transit Vehicle Low Level Exit Path Marking may be counted toward this requirement to the extent that they meet the criteria noted above (e.g., HPPL door delineators required to meet the LLEPM requirements that are installed on the door 18 inches. off the floor would count as 36 square inches of the 144 square inches required).
    Location 3: Emergency Window Exits Ensure all emergency window exit markings are constructed of high-performance photoluminescent material.

    What should you look for when choosing a high-performance photoluminescent (HPPL) system?

    The manufacturer or supplier of the HPPL material should be able to provide independent laboratory certified test result reports showing that all tested samples of passive HPPL material, as used in the finished component configurations (including any cover or protective coating if used, but not including text or graphics), complies with the minimum luminance criterion of 7.5 mcd/m2 , after 1.5 hours, when tested according to the provisions of ASTM E-2073-07, Standard Test Method for Photopic Luminance of Photoluminescent (Phosphorescent) Markings, with the following three modifications:
    • Activation: The HPPL material shall be activated with a fluorescent lamp of 40 W or less and a color temperature of 4000-4500º K that that provides no more than 1 fc of illumination as measured on the material surface. The activation period shall be for no more than 1 hour.
    • Luminance: The photopic luminance of all specimens of the HPPL material shall be measured with a luminance meter as described in 5.2 (of ASTM E-2073), a minimum of 1.5 hours after activation has ceased.
    • Luminance in mcd/m2: The test report shall include a luminance measurement of 1.5 hours after activation has ceased.
    The manufacturer or supplier is required to have a minimum of one batch of material for signs and/or markings of a given type certified. Know that signs or markings of the same certified type of material can be sold to multiple customers, even with minor changes in text or typography. The color and contrast of your PL or HPPL material are also very important. APTA Safety Standards states that the lettering and pictogram(s) utilized on interior emergency exit signage or markings needs to be able to achieve a luminance contrast ratio of not less than 0.5, as measured by a color-corrected photometer. The document recommends that the color contrast choice for all new and replacement signage is red lettering/graphics on a light PL background, preferably with a matte finish, except for those instances in which bold contrast with the background on which the sign is placed would not be attainable. It states that having a contrasting border around the outer edge of the sign will also enhance visibility. The standard also notes that the more of the HPPL surface that is visible, the more conspicuous the resulting sign. It warns that graphics or heavy text covering the HPPL material will reduce the light output of the sign letters, and thus the conspicuity and legibility of the signs as well, even though the HPPL material passes the tests required. The Passenger Rail Equipment Safety Standards (PRESS) applies to all commuter rail programs, and you can read the entire PRESS program in detail here. Please contact us with any questions regarding photoluminescent safety signage for your passenger rail cars.
  4. Top 4 Places for Slip and Fall Accidents
    Top 4 Places for Slip and Fall Accidents
    Did you know that slip and falls are the number one cause of accidental injury, resulting in 20.8 percent of all emergency room visits? We are all accident prone, it's a fact of life. With slip and fall accidents bound to happen, all we can do is limit dangers and hazards around areas and learn how to protect ourselves in order to prevent these mishaps from occurring. Some places tend to be more notorious for slip and fall injuries, so we are taking a look at them on the blog today to see what can be done to prevent accidents before they occur and protect people who find themselves in these top places for slip and fall accidents.

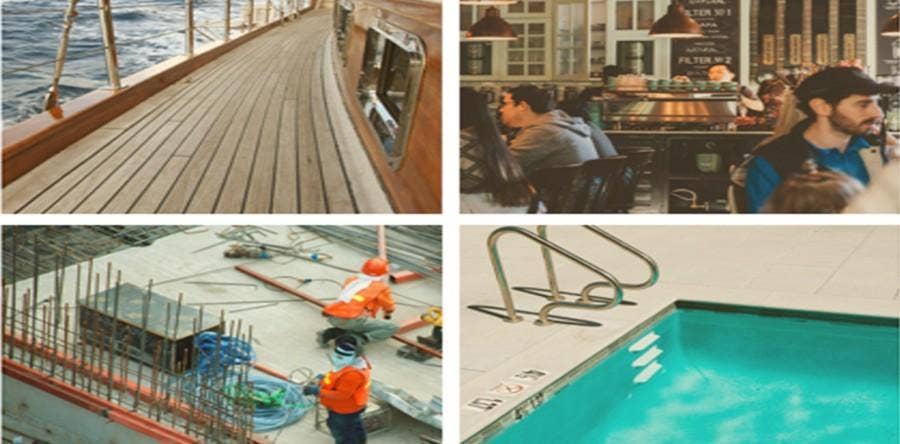
    BOATS

    From small fishing boats to large cruise or naval ships, boating continually ranks as one of the top places to experience a slip and fall accident. Even the safest ships that follow all rules, regulations and technological innovations still have people experiencing slip and fall accidents while aboard. Why? Because when you combine sleek surfaces and the continuous wave motions, accidents are prone to occur. In fact, wet surfaces make up 55% of all slip, trips, and falls in the hospitality industry! By taking proper precautions, you can greatly decrease the risk that an accident will occur while onboard a boat.

    Tips to Prevent Boat Slip and Fall Accidents:

    • For indoor areas of the boat, utilize non-slip tape or a non-slip floor coating in the kitchen quarters where all food prep takes place. Jessup’s Flex Track offers a non-abrasive adhesive to prevent slip and falls and is still comfortable on bare feet.
    • For exterior parts of boats, consider a stronger grade of non-slip tape or adhesive such as the Safety Track® 3800 Series which can withstand saltwater and ultraviolet exposure.
    • Stairs need to have non-slip stair treads applied and handrails in place.
    • Specific areas of the boat that need non-slip tape include: ramps, stairs, baths, pools, and the boat deck.
    • Make sure proper signage is in place, including wet location exit signs for outdoor areas of the boat.
    • Make sure any rugs are secured to the floor to prevent tripping.
    • Check lighting in hallways and exterior to make sure areas are well lit.
    • Maintain a clean boat. Mop up wet areas and putting proper signage down immediately and remove clutter, cords or other potential tripping hazards.
    • Always wear shoes with friction while on a boat.
      The Occupational Health and Safety Administration (OSHA) states that at least 43% of reported maritime injuries are a result of slip and fall accidents. Many boating slip and fall accidents can be preventing by taking the time to implement proper safety measures, offering better training for employees, and improving equipment maintenance.

    RESTAURANTS

    Because of all the grease, oil, liquid and food in restaurants they are a common offender for slip and fall accidents. Most restaurants take some measures to prevent slip and fall accidents and have floor safety procedures in place, but whether employees are following them appropriately is another question. Here are common best practices when it comes to slip and fall safety prevention at restaurants.

    Tips to Prevent Restaurant Slip and Fall Accidents:

    • Install slip-resistant flooring. Because the floors of restaurants are being hit with all sorts of liquids, the texture of the floors is extremely important in not only the back kitchen, but the dining and bathroom areas. Choosing a flooring that is slip-resistant will help with the daily hustle, including patrons and employees moving about.
    • Install an anti-slip film that is mop friendly to high traffic areas. Using a product like our Safety Track® 3500 Resilientâ„¢ Medium Grade anti-slip film around beverage areas, sinks, bathrooms, or in front of the stove can be an extra inexpensive barrier to further prevent slip and fall accidents.
    • Consider adding stair treads and ramp tread. Many people are moving around restaurants quickly, so if your establishment has stairs, consider adding stair treads as an added layer of protection.
    • Use a NFSI certified floor cleaner to clean your floors. This will ensure they are not slippery, but still perfectly clean.

    CONSTRUCTION SITES

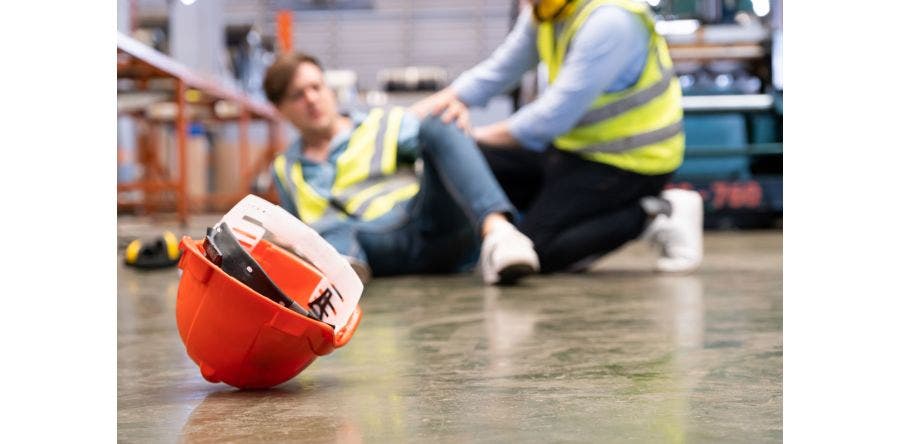
    OSHA continually puts fall violations within the construction industry as one of their top offenders. In fact, within the construction industry alone 991 workers lost their lives on the job in 2016. Having a fall prevention program in place and implementing a workplace slip and fall training can help give employers and employees the necessary training and tools needed to recognize, assess, and control potential slip, trip, or fall hazards. Consider these tips when working to prevent construction site slip and fall accidents.

    Tips to Prevent Construction Site Slip and Fall Accidents:

    • Put a clear statement or policy in place regarding the company’s strategy behind your slip and fall program. Help employees understand the purpose of the program and what is expected of the employer and employee, including their responsibilities in slip and fall prevention.
    • Training your employees is the greatest way for them to feel confident in their daily duties. A slip and fall training should be part of all employee onboarding and a continual slip and fall education should be held daily, quarterly, or yearly depending on the employees’ position. OSHA found that these types of training can reduce the risk of workplace injury and illness by up to 60%.
    • Know your workplace slip and fall risks and continually assess the area for changes.
    • Make sure you have the right equipment and products for slip and fall prevention. This will vary depending on your job, but common products used for slip and fall prevention within the construction industry includes:
      1. Correct footwear
      2. Handrails on stairs series greater than 3
      3. Caution signs for level changes
      4. Grit tape and grit treads in areas with liquid present or where heavy duty resistance is needed

    POOLS

    Swimming is the fourth most-popular sport in the United States according to the U.S. Census Bureau. Like any activity involving water, slip and fall accidents are bound to happen. In fact, over 39,500 people annually will seek hospital emergency room care for injuries involving below-ground pools and about 10,000 will need treatment for injuries related to above-ground pools according to the United States Consumer Product and Safety Commission. By limiting the dangers and hazards around pool areas, we can significantly work to prevent pool injuries from slips and falls. You can start by reviewing your pool and applying our tips to help prevent accidents from occurring.

    Tips to Prevent Pool Slip and Fall Accidents:

    • Start by checking the deck of the pool because it is the most common place for a slip and fall to occur. Often made of concrete, it can create a slip-n-slide effect if not monitored properly. Put proper safety signs in place and work to keep the pool deck dry. This can be easier said than done during busy times, but by making sure to review your horizontal depth markers on the pool deck it can help. They should be slip-resistant to be in accordance with the 2018 International Swimming Pool and Spa Code. Also, make sure the pool deck is slip-resistant at minimum within 4 feet of the pool according to 2018 International Swimming Pool and Spa Code.
    • Slide platforms and diving boards should have slip-resistant walking equipment. If steps are being used to access either of these, then the steps should be self-draining, with corrosion resistant stairs and ladders and slip-resistant stair treads.
      Steps and ladders should be continually reviewed to make sure they have a slip-proof surface that is working well.
    These are just a few places that commonly see slip and fall accidents. The quality of one’s life can be greatly impacted by taking a spill and falling in just the wrong way. By doing your part to work on fall prevention, it can mean the difference between life and death for yourself or someone else. By using our tips and working to put a program in place to plan to protect patrons and employees, you will be doing your part to prevent falls. A slip and fall safety program doesn’t have to be complex, but can make all the difference. By changing some daily habits, making some simple (usually inexpensive) changes, and continually assessing areas you can help to reduce slip and fall accidents. What other places do you commonly see slip and fall accidents occur? What additional tips would you offer up? If you have questions regarding non-slip adhesives, stair treads or other non-slip films contact our team of experts at Jessup Manufacturing to help walk you through the best options to fit your location.
  5. What is the Running Man Exit Sign and Where is It Used?
    What is the Running Man Exit Sign and Where is It Used?
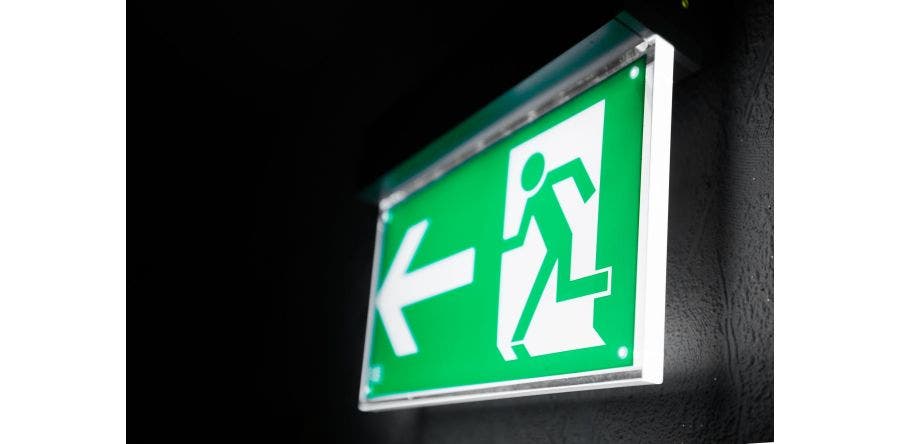
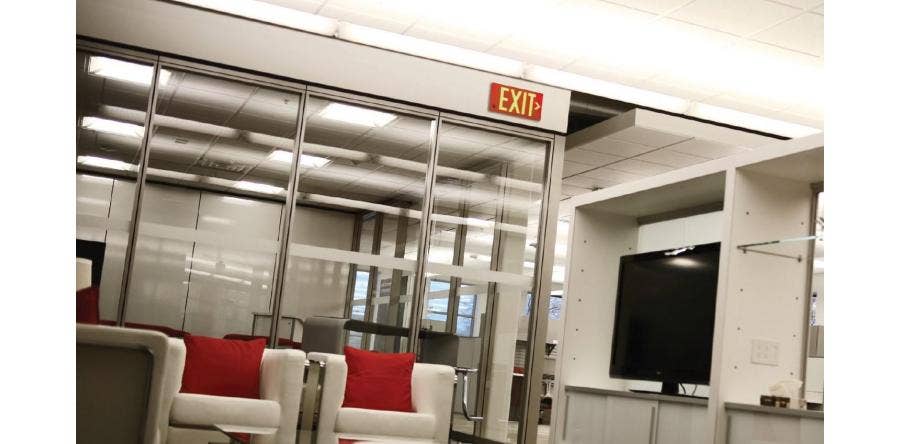
    We're all aware of the classic American emergency exit sign. The one that has been around since 1911 and spells out the word "EXIT" in bright red lettering. The National Fire Protection Association (NFPA) went on to create criteria for emergency-exit signage, taking into consideration various contrast levels and evaluating different lettering sizes, eventually publishing the standards adopted by state and local governments across the states. We see these bright signs hovering over doors and corridors within America's buildings, directing us to safety. But what about the rest of the world? Internationally, many countries have adopted some version of the ISO standard, a symbol deemed the "Running Man exit sign". Should your building consider implementing the Running Man exit signs? First, a brief history of exit signs is needed in order to understand how they have evolved and where we are at today. In the United States, it all started in 1911. A huge fire in a downtown Manhattan garment factory killed 146 workers, which sparked NFPA to act on creating a way to get people out of buildings quicker. Thus, the American EXIT sign was born. Early exit signs were made of either metal and lit by a nearby incandescent light bulb or having a white glass cover with "EXIT" written in red, placed directly in front of a single-bulb light fixture. However, in the case of a fire, the power to these lights often failed or were barely visible, rendering them useless for their important job. This evolved to adding red-tinted globes in the emergency exit signs to allow for better visibility. Through the years better emergency EXIT signs have been developed and today we have several options on the market. These include the most popular photoluminescent emergency exit signs and LED emergency exit signs. Jessup Manufacturing's Glo Brite® emergency exit signs are engineered with photoluminescent material which allows them to absorb and store LED, fluorescent, metal halide or mercury vapor light. Photoluminescent exit signs require no electricity and no maintenance.

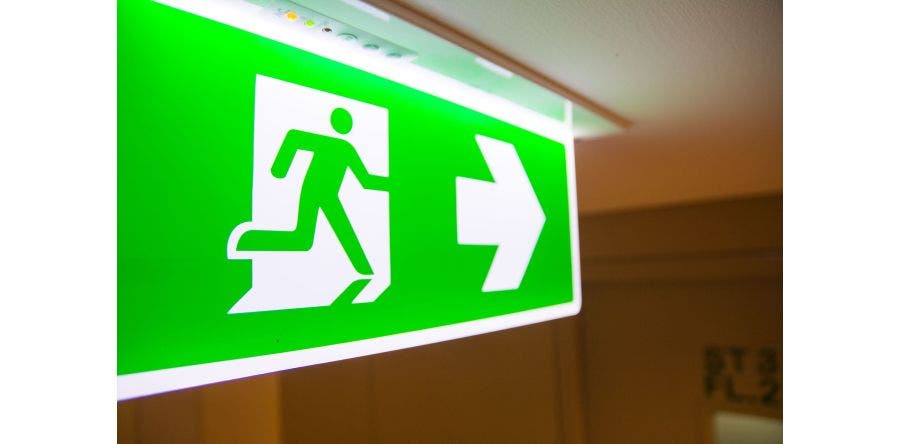
    But what about the green-lit pictogram Running Man exit sign?

    While the bright red EXIT signs were being implemented all over America, the little green lit Running Man exit sign was being developed by a Japanese pictogram designer named Yukio Oto in the late 1970's. He states that his goal in creating the sign was to communicate to people to "run slowly." The International Organization for Standardization (ISO) was ready to adopt a Soviet Union pictogram, but after hearing about the extensive testing Ota put this sign through, ISO decided to take it into consideration. Ota's sign eventually won out and was adopted for international use in 1985. Ota's design of the Running Man exit sign is argued to have a couple key advantages over the red EXIT signs:
    • It's green. Red is often the international color meaning danger or don't touch. Green, on the other hand, is a color of safety and means go all over the world.
    • It's a pictogram. It's a universal language with no barriers. Visitors speaking any language are able to understand what a person running through a door in a specific direction means.
    Agree or disagree with these statements, they stand at the center of the great emergency exit sign debate that has been brewing for 30+ years now. Throughout the world, exit signs follow ISO standards and use the green pictogram of a figure running and an arrow in the direction of the exit. These signs may also have words in the local language indicating an exit. For these reasons, many countries now use some version of this ISO standard created by Ota.

    Australia Makes the Switch to the Running Man Exit Sign

    After many European countries, Japan, and others moved away from the EXIT sign, Australia decided to follow suite in 2005. The National Construction Code (Building Code of Australia) shifted away from the word ˜EXIT" to the universal pictograph through the introduction of Australian Standard 2293, 'Emergency escape lighting and exit signs for buildings.' This update brought Australia into line with the international standards outlined in ISO3864-1.

    Canada Also Moves to the Running Man Exit Sign

    In 2010, Canada's National Building Code (NBC) made the change to the Running Man exit sign stating that red and white EXIT or UT” signs needed to be replaced by a sign of a white or green man running towards the emergency exit. The change is largely being driven by the country's changing demographics and reflects a desire to help those who don't speak English or French, according to Phil Rizcallah, director of the National Research Council's building regulations group. The Ontario government now requires every new building or major building renovation undertaken since Jan. 1, 2014 to include these new emergency exit signs. By implementing the green Running Man emergency exit sign, they believe it will be easier for those visiting or immigrants of the country to understand where to go in case of an emergency. They also include that the signs may also be photoluminescent, which allows them to give off their light without the need for electricity.

    Benefits of the Running Man Exit Sign

    We briefly mentioned earlier a few potential advantages of the Running Man exit sign. Advocates of the Running Man emergency exit signs debate those and other reasons why they are superior to regular EXIT signs.
    • No matter where it is installed, the Running Man exit sign can be configured to your emergency exit location. The sign can be purchased depicting a Running Man going left (←), right (→) or here (↓). And unlike conventional EXIT signs, the Running Man will never have arrows in two different directions, making it crystal clear on where the quickest path to exit is.
    • Green is a more sensible color then red when it comes to emergency exit signs. The NFPA does acknowledge this point and it is important to note they never mandated the EXIT signs be in red, simply that a contrast exists between the text and the background. Green is thought to mean go and safety, while many state that red indicates stop or harm.
    • It has been argued that the Running Man exit signs are more visible than regular EXIT signs due to the use of imagery and color.

    Should Your Building Use the Running Man Exit Sign?

    While the NFPA has no plans to substitute the classic American emergency EXIT sign anytime soon, you can't deny the Running Man's widespread appeal. Many large municipalities, as well as international companies within the United States, have begun to add the ISO Running Man exit signs to better communicate safe exits for international visitors in their buildings. NFPA states they have considered the change on several occasions and although they don't object to the Running Man emergency exit sign and the green color, they see no reason to make a mandated change. In fact, NFPA even includes Ota's ISO Running Man within the group of auxiliary symbols that their members may use and also allows the use of pictograms in tandem with the "EXIT" text, where local jurisdictions allow. However, NFPA says they have no current plans to eliminate the classic "EXIT" sign, which they state works perfectly fine stateside. Still, you will notice more green lit "EXIT" signs are popping up throughout the United States (although red is still the predominant color of choice). Even more, in 2006 New York City amended its fire code to mandate that high-rises include the ISO Running Man pictogram sign on fire doors on each floor. There is no denying that exit signs play an important role in keeping people across the world safe. Since the Running Man exit sign is not subject to any language barrier, this universal symbol is a smart choice when it comes to optimizing fire safety procedures within a building. As a leader in fire prevention, Jessup Manufacturing is proud to offer a wide range of emergency exit sign options for your facility, including various Running Man exit signs.      
  6. The Definitive Guide to Industrial Anti-Slip & Safety Tapes: Preventing Slips, Falls, and Fines
    The Definitive Guide to Industrial Anti-Slip & Safety Tapes: Preventing Slips, Falls, and Fines

    If you've spent any time on an actual manufacturing floor or warehouse—not just looking at blueprints, but where the work actually happens—you know that floor safety isn't some abstract HR mandate. It’s an urgent, immediate concern. In industrial settings, the slip, trip, or fall isn't just a clumsy moment; it’s one of the biggest, most common dangers out there, and frankly, one of the most neglected until a crisis hits. These incidents halt production, they cause real injuries, and they create a chaotic mess no one wants to clean up. We’re talking about industrial anti slip tape here, and when you’re looking at it, you shouldn't be thinking about tape at all. You should be thinking about a critical piece of safety engineering that keeps your entire operation moving. This is about moving past cheap fixes and adopting a reliable, long-term system, especially when dealing with high-risk areas that desperately need heavy duty floor grip tape or reliable warehouse safety matting alternatives. We need to shift our focus from damage control to comprehensive hazard prevention, because the floor is where every operation begins and ends.

    I. The Cost of Complacency: It’s Not Just a Band-Aid

    To be honest, most people only look seriously at floor safety after an incident—when the legal department is calling and the production line is stopped. But by then, the real damage is done. The cost of a single serious slip-and-fall isn't just the ambulance ride and the medical bills, though those are terrible enough. The cost spirals quickly when you factor in investigation time, the need for replacement staffing, lost production hours while the scene is secured, insurance premium hikes that can last for years, and let's not forget the enormous emotional and organizational toll on the victim and their coworkers.

    The Regulatory and Legal Hammer

    Then there’s the non-negotiable legal stuff. OSHA floor safety compliance isn't a suggestion; it’s the law, and failing to secure walking and working surfaces adequately guarantees you'll be facing severe fines. OSHA standard 1910.22(a)(1) is pretty clear: "All places of employment, passageways, storerooms, and service rooms shall be kept clean and orderly and in a sanitary condition." While that sounds simple, it translates directly into ensuring floors are free of conditions that could cause slips. The agency takes failure to address known slick areas, uneven ramps, or inadequately marked stairs very seriously, often citing the General Duty Clause when specific standards aren't met. Trying to get away with a low-grade fix is essentially a gamble, and when the stakes are human health and regulatory scrutiny, you really can't afford to lose. We have to look at this proactively and understand that spending a little more upfront on certified, quality safety materials drastically lowers the cost of workplace slip and fall incidents down the line.

    Case Study: The Hidden Liability

    Consider the difference between a cheap, low-CoF (Coefficient of Friction) tape and a heavy duty floor grip tape that is certified. A major manufacturing plant installed a budget grip solution on an outdoor ramp leading into the facility. During a sudden freeze, the budget tape cracked and failed to provide grip, leading to an employee injury. The ensuing litigation didn't just focus on the injury; it focused on the choice of material—why was a commercial-grade tape used in a known freeze-thaw cycle environment? The liability stemmed from using an inappropriate material for the application. Your material selection is not just a purchase; it's a documented risk assessment. This is why you must partner with a manufacturer who can provide technical data proving their product meets or exceeds the necessary safety standards for your specific environment.

    II. Beyond "Grit": The Material Science of Traction

    So, if all anti-slip tape looks pretty much the same—some sandpaper glued onto vinyl—why do some last two months and others last two years? The difference, in simple terms, is the science behind the film. You see, not all grit is created equal, and more importantly, not all carriers and adhesives can handle the punishment of a real industrial environment. You need to look closely at the actual abrasive safety tape materials.

    A. The Abrasive Material (Grit) and CoF

    The effectiveness of a tape is ultimately measured by its Coefficient of Friction (CoF)—a scientific measure of the force required to slide an object across a surface. A higher CoF means better traction. Jessup ensures superior performance by using materials engineered for specific stress levels:

    • Commercial Grade: This is your standard, reliable safety solution. It's great for light-to-moderate foot traffic, dry conditions, and interior office-to-warehouse transitions. It's robust, but it’s not designed for continuous forklift abuse.

    • Heavy-Duty Grade: This is where we step up the material science. These tapes are built using a denser, often coarser, abrasive particle (like aluminum oxide) and a tougher carrier. They are designed to withstand modest fork truck traffic, harsh cleaning cycles, chemical exposure, and repeated impact. If you have areas of constant turning or pivoting, this grade is essential.

    • Military Grade (Extreme): The ultimate solution for maximum longevity and extreme environments—think outdoor steps subject to salt, oil-soaked mezzanines, or areas exposed to severe weather and chemical washdowns. These materials offer maximum longevity and resilience under almost impossible conditions, representing the pinnacle of industrial grade traction solutions.

    B. The Carrier Film and Adhesive Resilience

    The strongest grit is useless if the tape lifts. The carrier film—the vinyl or polymer substrate the grit sits on—must be dimensionally stable. This means it resists shrinking or curling, which is often caused by temperature fluctuations or exposure to cleaning solvents. The adhesive is equally critical; it must be aggressive and specialized:

    • Aggressive Adhesives: For difficult surfaces like porous concrete, worn wood, or metal surfaces covered in rust-inhibiting paint, you require adhesives formulated to bite into irregular textures and resist moisture ingress. We often use solvent-based acrylic adhesives that create a mechanical bond with these rough surfaces, far superior to simple rubber-based glues.

    • Chemical Resistance: In many facilities, the biggest threat isn't traffic, but chemicals. Hydraulic fluids, cutting oils, solvents, and harsh floor cleaners can cause low-quality adhesives to break down. Choosing a chemical-resistant adhesive coated floor tape is non-negotiable in maintenance bays or machining centers.

    III. The Jessup Solution Matrix: Matching Tape to the Hazard

    Jessup’s product lines are designed to address every unique floor condition, ensuring you apply the right solution every time.

    1. The Industrial Workhorse: Safety Track® Grit

    • Problem Solved: High-traffic industrial zones, oily areas, stairs, and ramps.

    • The Science: Utilizes aggressive mineral grit (aluminum oxide) bonded to a heavy-duty vinyl carrier. This is your go-to for maximum CoF and resistance to chemicals and industrial fluids.

    • Specific Examples: Loading dock ramps, exterior fire escapes, facility perimeter steps, heavy equipment footboards.

    2. The Gentle Giant: Flex Track® Soft Touch

    • Problem Solved: Areas requiring excellent wet-area grip but where people may be barefoot or wearing non-traditional footwear.

    • The Science: This isn't grit; it's a soft, textured, rubberized material. It ensures safe footing without the abrasion of traditional Safety Track® Grit.

    • Specific Examples: Locker rooms, changing areas, boat decks, hospital corridors, pool surrounds. The human factor here is key—it protects skin and delicate shoe materials while preventing slips.

    3. The Resilient Grip: Safety Track® Rubberized

    Let's face it, sometimes you need a blend of qualities. You need something tough enough to handle a work boot, but maybe it's in an area where someone might occasionally walk through in socks or bare feet—think a changing station near a machine shop, or light industrial steps leading to a break room. This is where the Safety Track® Rubberized line steps in. It solves that tricky problem of high-abrasion areas that still need a touch of comfort. The science behind it is a durable, textured PVC film that manages to deliver a genuinely robust grip that’s completely resilient to tearing and peeling under stress. It gives you the longevity you expect, but with a gentler feel than our aggressive grit tapes. You'll find this working perfectly for things like emergency exit routes, the back steps of a retail store, or maybe temporary walkways where you need quick, dependable traction without the commitment or abrasion of a permanent grit solution.

    The Role of Customization: Beyond the Roll

    Here's an insider tip: you don't always need to order a giant roll of tape and cut it yourself. Trying to apply grip tape to unique surfaces—like the oddly shaped footboards on specialized machinery or the exact width of a particular staircase tread—can lead to wasted material and a messy, unprofessional installation. That's why we heavily lean into customization. Jessup’s whole history is built on this; we specialize in die-cut custom shapes and treads that arrive perfectly sized. This means zero waste and a clean, seamless application every time, even for those odd-shaped platforms. It’s a huge win for any lean operation, letting your team focus on application rather than measuring and cutting, and it’s a service built right into our 65 years of material experience.

    IV. Installation & Maintenance for Maximum Lifespan

    Even the world's most scientifically advanced heavy duty floor grip tape will fail if you slap it onto a dirty, cold floor. Installation isn’t rocket science, but it demands attention to detail. This builds massive E-A-T because we know the product is only as good as its application.

    A. Surface Preparation: The Non-Negotiable Step

    The failure of anti-slip tape is almost always adhesive failure, and that starts with poor preparation.

    • Clean & Degrease: The surface must be completely free of oil, grease, dust, paint chips, and debris. Use an industrial-grade cleaner or degreaser relevant to the substrate (e.g., strong solvent for metal, alkaline cleaner for concrete).

    • Test for Porosity: If you’re installing anti slip tape on concrete, check its porosity. A few drops of water should quickly soak in. If water beads, the concrete has been sealed or treated, and you must abrade that layer before proceeding.

    • Prime (The Insurance Step): For porous or chemically challenging surfaces, a primer or edge sealer should be used. This essentially fills the pores in the substrate, giving the tape's adhesive a perfectly smooth, chemically stable surface to bond to. It’s like adding extra insurance for critical installations.

    B. The Role of Temperature and Timing

    The next piece of the puzzle, and this is crucial, involves temperature and patience. The tape's adhesive bond—that initial sticky grab—is incredibly sensitive to how hot or cold the surface is. We strongly recommend you stick to the manufacturer's recommended ambient and surface temperature range, which usually means keeping things above 10{C} (or 50{F}). Honestly, if you try applying the tape when the concrete slab is freezing, you're essentially ensuring premature failure. The adhesive can’t flow and grab the pores properly, and that initial, foundational bond is compromised from the start.

    Now, once the tape is perfectly placed, don't rush it. Yes, traffic might be possible right away, but the strongest, most dependable chemical bond needs time. We call this the cure time. Give the adhesive anywhere from 24 to 72 hours to fully set up and achieve its maximum strength. This isn't just a technical detail for the installer; it's a scheduling communication point you absolutely need to pass along to your operations manager so they know when that area is truly ready for heavy abuse.

    C. Maintenance: Keeping the CoF High

    Finally, let’s talk about keeping the Coefficient of Friction (CoF) high. If your industrial grip tape is clogged with oil, rubber dust, or packed-in dirt, it can't actually do its job. It loses its bite. That means regular cleaning is mandatory, not optional.

    When you clean it, watch out for harsh chemicals. Do not use aggressive solvents; they can seriously degrade the adhesive over time, causing the tape to lift prematurely. Just stick to mild detergents and water—simple is often better here. For the tough stuff, you'll need to get proactive. Use a stiff nylon brush or a medium-bristle deck brush. Don't just wipe; you need to genuinely scrub and agitate the surface to loosen any embedded debris trapped deep within the grit valleys. That ensures the tape stays rough and effective, doing the safety work you paid for.

    Conclusion: Invest in Certainty, Not Chance

    You have a choice to make whenever you spec a safety material: do you buy the cheapest product and cross your fingers, or do you invest in a solution engineered by decades of real-world use? For over 65 years, Jessup Manufacturing has been obsessed with making materials that absolutely will not fail under pressure. We’ve seen every nasty application and every challenging surface imaginable, and we’ve built our lines to overcome them.

    When you choose our Safety Track® or Flex Track® lines, you aren't just buying tape; you are investing in a tested, guaranteed industrial safety solution designed to meet the toughest standards. We’re selling certainty—certainty in compliance, certainty in performance, and certainty that your safety investment will pay off.

    If you’re facing a particularly difficult outdoor ramp, a chemically exposed washdown area, or any spot where failures simply aren’t an option, stop guessing. Consult our experts today. We'll use our material science knowledge to help you explore the exact system you need to ensure your floors are safe, compliant, and durable long after the competition has crumbled.

  7. Coarse vs. Fine Grit Tape: Choose the Right Traction Level (CoF)
    Coarse vs. Fine Grit Tape: Choose the Right Traction Level (CoF)

    If you've ever dealt with safety materials, you know the frustration. When you're shopping for anti slip tape, the first thing everyone looks at is the color—is it hazard yellow, or just basic black? It makes sense; color is easy to see. But honestly, the single most critical factor that determines whether that tape prevents a disaster or just becomes a slick spot itself isn’t the color at all—it’s the grit level. Think of the grit size as the gear ratio for your traction system. You wouldn't use the same tire treads for a paved road as you would for a muddy construction site, right? The same absolutely crucial logic applies here, and getting this specific detail wrong is one of the most common mistakes we see in facility safety plans, often leading to costly failures when a spill hits.

    This entire discussion boils down to the Coefficient of Friction non-slip measurement, or CoF. It sounds technical, but in simple terms, CoF just tells you how much force it takes to make something slide across a surface. The larger the abrasive particle—the coarser the grit—the higher the peaks and valleys on the tape. In theory, more peaks mean more grip. But the true, practical magic is how those peaks and valleys handle contamination—we’re talking oil, mud, standing water, or even snow. The coarser the grit, the deeper the channels it creates, giving those contaminants a dedicated space to go so that the sole of the shoe still maintains solid contact with the sharp, exposed abrasive material. That, right there, is the definition of a reliable industrial anti slip tape system doing the job it was engineered for.

    The Deep Dive: Coarse Grit (The Workhorse)

    When we talk about coarse grit anti slip tape, we're typically looking at materials rated around 60-grit or lower. This isn't just a slightly rougher surface; this is the heavy artillery of the safety world. You want this material when you're facing serious environmental challenges and continuous contamination. To be totally honest, if you're installing tape outside, or anywhere near heavy machinery, this should be your starting point.

    The key advantage of coarse grit is what we call its displacement mechanism. Imagine your floor is constantly contaminated by motor oil and sludge in a high-traffic maintenance bay. If you were to use a fine grit tape here, the contaminant would quickly form a continuous, thin layer right over the low-profile peaks, essentially turning the tape into a slick skating rink. The shoe simply glides across the oil. Coarse grit, however, creates those deep, pronounced valleys we discussed. As pressure is applied by the boot, the viscous contaminant is physically forced into those deeper valleys, allowing the shoe's sole to maintain critical contact with the sharp, exposed abrasive particles. It truly is a kind of self-cleaning nature—it actively pushes away the hazard so the traction stays intact.

    So, where is coarse grit absolutely non-negotiable? Think about Outdoor Ramps and Docks. These areas are subject to snow, ice, mud, and extreme weather cycling. Coarse grit is the only reliable solution because the depth of the particle allows it to effectively bite through thin layers of ice and displace standing water. Then consider Heavy Machinery and Oil-Contaminated Zones. Forklift treads, construction equipment steps, and areas where hydraulic fluid or cutting oil is common must use coarse grit. The aggressive profile resists packing out with sludge. Finally, there's Extreme Longevity. Because the particles are larger and deeper, they take significantly longer to wear down under heavy, continuous foot traffic, giving the tape a much more durable lifespan in abuse-prone areas.

    Now, coarse grit is incredibly effective, but every material choice involves trade-offs you have to carefully calculate. It is undeniably harsh—it will rapidly wear down the soles of lighter footwear and is definitely not suitable for bare feet or areas where people wear sneakers. Also, while it displaces thick contaminants well, it can sometimes be a genuine challenge to sweep fine dust (like flour, cement dust, or fine metal filings) completely out of those deep valleys without proper industrial vacuuming or high-pressure washing. That stubborn residue can actually hide and eventually compromise the grip if not maintained correctly.

    The Deep Dive: Fine Grit (The Precision Tool)

    Moving to fine grit safety tape (typically 100-grit and higher) is a complete shift in strategy. Here, we're not prioritizing brute force. Instead, we are looking for a dense, tightly packed abrasive surface that offers a much smoother, more uniform profile. This strategy isn't about displacement; it's about providing continuous, clean contact over a wide surface area.

    The "smooth" advantage is fascinating. Fine grit creates many more contact points per square inch than a coarse grit does. While the individual peaks are smaller and less pronounced, their sheer number ensures excellent traction, provided the surface is generally clean and contamination is quickly addressed. This makes for a more comfortable walking surface and, critically, one that is easier to maintain.

    So, where does fine grit shine? Think about Commercial Kitchens and Food Processing. These areas are subject to grease and water, but they are also cleaned aggressively and frequently throughout the day. Fine grit is mandatory here because its smoother profile stands up far better to repeated power washing and scrubbing without shedding the abrasive, and just as important, it is much less likely to harbor bacteria and fine particulates than the deep, moisture-retaining channels of a coarse tape. You'll also see it in Maintenance Bays dealing with Fine Dust like welding slag or cement powder. Here, the deeper valleys of a coarse tape would be instantly packed solid and become nearly impossible to clean manually. A fine grit tape, being less aggressive, is much easier to sweep and vacuum, preventing the abrasive surface from becoming masked by the contaminant.

    The primary limitation of fine grit is its effectiveness against standing water or viscous contaminants. A large puddle of water or a thick layer of mud can easily bridge the small gaps between the particles, creating a momentary hydroplaning effect. If your contamination is heavy, thick, or persistent, you simply must use coarse grit. But if the floor is generally clean, or if the primary concern is slip prevention from light moisture and ease of cleaning, fine grit is absolutely the safer, smarter choice.

    The Expert’s Guide: Making the Final Material Call

    The final decision must be made by precisely analyzing the expected contaminant and the traffic, not just the budget. This is the difference between purchasing safety tape and actually engineering a safety solution.

    1. Viscosity Matters: Is the expected contaminant low-viscosity (water, coffee, light oil) or high-viscosity (heavy grease, industrial sludge)? High-viscosity demands coarse grit for displacement. Low-viscosity can often be managed by fine grit if spills are immediately cleaned up.

    2. Frequency of Cleaning: If the area is cleaned hourly (like a food processing washdown zone), fine grit is manageable because the surface is rarely dirty for long. If the area is cleaned only weekly (like an outdoor loading ramp), coarse grit is needed to maintain safety between those cycles.

    3. Footwear: If 100% of the traffic involves heavy, protective work boots, coarse grit is safe. If there’s any mix of soft-soled shoes, trainers, or standard office footwear, fine grit is the safest default unless the contamination risk is extreme.

    Jessup has engineered the Safety Track® Anti-Slip Tapes (Grit) to give you specific options for every scenario, guaranteeing the right CoF and durability for your industrial environment. Getting the grit level right is the single most important step in moving from a temporary fix to a permanent, compliant, and reliable safety solution.

ALL POSTS

Coarse vs. Fine Grit Tape: Choose the Right Traction Level (CoF)

If you've ever dealt with safety materials, you know the frustration. When you're shopping for anti slip tape, the first thing everyone looks at is the color—is it hazard yellow, or just basic black? It makes sense; color is easy to see. But honestly, the single most critical factor that determines whether that tape prevents a disaster or just becomes a slick spot itself isn’t the color at all—it’s the grit level. Think of the grit size as the gear ratio for your traction system. You wouldn't use the same tire treads for a paved road as you would for a muddy construction site, right? The same absolutely crucial logic applies here, and getting this specific detail wrong is one of the most common mistakes we see in facility safety plans, often leading to costly failures when a spill hits.

This entire discussion boils down to the Coefficient of Friction non-slip measurement, or CoF. It sounds technical, but in simple terms, CoF just tells you how much force it takes to make something slide across a surface. The larger the abrasive particle—the coarser the grit—the higher the peaks and valleys on the tape. In theory, more peaks mean more grip. But the true, practical magic is how those peaks and valleys handle contamination—we’re talking oil, mud, standing water, or even snow. The coarser the grit, the deeper the channels it creates, giving those contaminants a dedicated space to go so that the sole of the shoe still maintains solid contact with the sharp, exposed abrasive material. That, right there, is the definition of a reliable industrial anti slip tape system doing the job it was engineered for.

The Deep Dive: Coarse Grit (The Workhorse)

When we talk about coarse grit anti slip tape, we're typically looking at materials rated around 60-grit or lower. This isn't just a slightly rougher surface; this is the heavy artillery of the safety world. You want this material when you're facing serious environmental challenges and continuous contamination. To be totally honest, if you're installing tape outside, or anywhere near heavy machinery, this should be your starting point.

The key advantage of coarse grit is what we call its displacement mechanism. Imagine your floor is constantly contaminated by motor oil and sludge in a high-traffic maintenance bay. If you were to use a fine grit tape here, the contaminant would quickly form a continuous, thin layer right over the low-profile peaks, essentially turning the tape into a slick skating rink. The shoe simply glides across the oil. Coarse grit, however, creates those deep, pronounced valleys we discussed. As pressure is applied by the boot, the viscous contaminant is physically forced into those deeper valleys, allowing the shoe's sole to maintain critical contact with the sharp, exposed abrasive particles. It truly is a kind of self-cleaning nature—it actively pushes away the hazard so the traction stays intact.

So, where is coarse grit absolutely non-negotiable? Think about Outdoor Ramps and Docks. These areas are subject to snow, ice, mud, and extreme weather cycling. Coarse grit is the only reliable solution because the depth of the particle allows it to effectively bite through thin layers of ice and displace standing water. Then consider Heavy Machinery and Oil-Contaminated Zones. Forklift treads, construction equipment steps, and areas where hydraulic fluid or cutting oil is common must use coarse grit. The aggressive profile resists packing out with sludge. Finally, there's Extreme Longevity. Because the particles are larger and deeper, they take significantly longer to wear down under heavy, continuous foot traffic, giving the tape a much more durable lifespan in abuse-prone areas.

Now, coarse grit is incredibly effective, but every material choice involves trade-offs you have to carefully calculate. It is undeniably harsh—it will rapidly wear down the soles of lighter footwear and is definitely not suitable for bare feet or areas where people wear sneakers. Also, while it displaces thick contaminants well, it can sometimes be a genuine challenge to sweep fine dust (like flour, cement dust, or fine metal filings) completely out of those deep valleys without proper industrial vacuuming or high-pressure washing. That stubborn residue can actually hide and eventually compromise the grip if not maintained correctly.

The Deep Dive: Fine Grit (The Precision Tool)

Moving to fine grit safety tape (typically 100-grit and higher) is a complete shift in strategy. Here, we're not prioritizing brute force. Instead, we are looking for a dense, tightly packed abrasive surface that offers a much smoother, more uniform profile. This strategy isn't about displacement; it's about providing continuous, clean contact over a wide surface area.

The "smooth" advantage is fascinating. Fine grit creates many more contact points per square inch than a coarse grit does. While the individual peaks are smaller and less pronounced, their sheer number ensures excellent traction, provided the surface is generally clean and contamination is quickly addressed. This makes for a more comfortable walking surface and, critically, one that is easier to maintain.

So, where does fine grit shine? Think about Commercial Kitchens and Food Processing. These areas are subject to grease and water, but they are also cleaned aggressively and frequently throughout the day. Fine grit is mandatory here because its smoother profile stands up far better to repeated power washing and scrubbing without shedding the abrasive, and just as important, it is much less likely to harbor bacteria and fine particulates than the deep, moisture-retaining channels of a coarse tape. You'll also see it in Maintenance Bays dealing with Fine Dust like welding slag or cement powder. Here, the deeper valleys of a coarse tape would be instantly packed solid and become nearly impossible to clean manually. A fine grit tape, being less aggressive, is much easier to sweep and vacuum, preventing the abrasive surface from becoming masked by the contaminant.

The primary limitation of fine grit is its effectiveness against standing water or viscous contaminants. A large puddle of water or a thick layer of mud can easily bridge the small gaps between the particles, creating a momentary hydroplaning effect. If your contamination is heavy, thick, or persistent, you simply must use coarse grit. But if the floor is generally clean, or if the primary concern is slip prevention from light moisture and ease of cleaning, fine grit is absolutely the safer, smarter choice.

The Expert’s Guide: Making the Final Material Call

The final decision must be made by precisely analyzing the expected contaminant and the traffic, not just the budget. This is the difference between purchasing safety tape and actually engineering a safety solution.

  1. Viscosity Matters: Is the expected contaminant low-viscosity (water, coffee, light oil) or high-viscosity (heavy grease, industrial sludge)? High-viscosity demands coarse grit for displacement. Low-viscosity can often be managed by fine grit if spills are immediately cleaned up.

  2. Frequency of Cleaning: If the area is cleaned hourly (like a food processing washdown zone), fine grit is manageable because the surface is rarely dirty for long. If the area is cleaned only weekly (like an outdoor loading ramp), coarse grit is needed to maintain safety between those cycles.

  3. Footwear: If 100% of the traffic involves heavy, protective work boots, coarse grit is safe. If there’s any mix of soft-soled shoes, trainers, or standard office footwear, fine grit is the safest default unless the contamination risk is extreme.

Jessup has engineered the Safety Track® Anti-Slip Tapes (Grit) to give you specific options for every scenario, guaranteeing the right CoF and durability for your industrial environment. Getting the grit level right is the single most important step in moving from a temporary fix to a permanent, compliant, and reliable safety solution.

2025-10-03 11:27:00

The Definitive Guide to Industrial Anti-Slip & Safety Tapes: Preventing Slips, Falls, and Fines

If you've spent any time on an actual manufacturing floor or warehouse—not just looking at blueprints, but where the work actually happens—you know that floor safety isn't some abstract HR mandate. It’s an urgent, immediate concern. In industrial settings, the slip, trip, or fall isn't just a clumsy moment; it’s one of the biggest, most common dangers out there, and frankly, one of the most neglected until a crisis hits. These incidents halt production, they cause real injuries, and they create a chaotic mess no one wants to clean up. We’re talking about industrial anti slip tape here, and when you’re looking at it, you shouldn't be thinking about tape at all. You should be thinking about a critical piece of safety engineering that keeps your entire operation moving. This is about moving past cheap fixes and adopting a reliable, long-term system, especially when dealing with high-risk areas that desperately need heavy duty floor grip tape or reliable warehouse safety matting alternatives. We need to shift our focus from damage control to comprehensive hazard prevention, because the floor is where every operation begins and ends.

I. The Cost of Complacency: It’s Not Just a Band-Aid

To be honest, most people only look seriously at floor safety after an incident—when the legal department is calling and the production line is stopped. But by then, the real damage is done. The cost of a single serious slip-and-fall isn't just the ambulance ride and the medical bills, though those are terrible enough. The cost spirals quickly when you factor in investigation time, the need for replacement staffing, lost production hours while the scene is secured, insurance premium hikes that can last for years, and let's not forget the enormous emotional and organizational toll on the victim and their coworkers.

The Regulatory and Legal Hammer

Then there’s the non-negotiable legal stuff. OSHA floor safety compliance isn't a suggestion; it’s the law, and failing to secure walking and working surfaces adequately guarantees you'll be facing severe fines. OSHA standard 1910.22(a)(1) is pretty clear: "All places of employment, passageways, storerooms, and service rooms shall be kept clean and orderly and in a sanitary condition." While that sounds simple, it translates directly into ensuring floors are free of conditions that could cause slips. The agency takes failure to address known slick areas, uneven ramps, or inadequately marked stairs very seriously, often citing the General Duty Clause when specific standards aren't met. Trying to get away with a low-grade fix is essentially a gamble, and when the stakes are human health and regulatory scrutiny, you really can't afford to lose. We have to look at this proactively and understand that spending a little more upfront on certified, quality safety materials drastically lowers the cost of workplace slip and fall incidents down the line.

Case Study: The Hidden Liability

Consider the difference between a cheap, low-CoF (Coefficient of Friction) tape and a heavy duty floor grip tape that is certified. A major manufacturing plant installed a budget grip solution on an outdoor ramp leading into the facility. During a sudden freeze, the budget tape cracked and failed to provide grip, leading to an employee injury. The ensuing litigation didn't just focus on the injury; it focused on the choice of material—why was a commercial-grade tape used in a known freeze-thaw cycle environment? The liability stemmed from using an inappropriate material for the application. Your material selection is not just a purchase; it's a documented risk assessment. This is why you must partner with a manufacturer who can provide technical data proving their product meets or exceeds the necessary safety standards for your specific environment.

II. Beyond "Grit": The Material Science of Traction

So, if all anti-slip tape looks pretty much the same—some sandpaper glued onto vinyl—why do some last two months and others last two years? The difference, in simple terms, is the science behind the film. You see, not all grit is created equal, and more importantly, not all carriers and adhesives can handle the punishment of a real industrial environment. You need to look closely at the actual abrasive safety tape materials.

A. The Abrasive Material (Grit) and CoF

The effectiveness of a tape is ultimately measured by its Coefficient of Friction (CoF)—a scientific measure of the force required to slide an object across a surface. A higher CoF means better traction. Jessup ensures superior performance by using materials engineered for specific stress levels:

  • Commercial Grade: This is your standard, reliable safety solution. It's great for light-to-moderate foot traffic, dry conditions, and interior office-to-warehouse transitions. It's robust, but it’s not designed for continuous forklift abuse.

  • Heavy-Duty Grade: This is where we step up the material science. These tapes are built using a denser, often coarser, abrasive particle (like aluminum oxide) and a tougher carrier. They are designed to withstand modest fork truck traffic, harsh cleaning cycles, chemical exposure, and repeated impact. If you have areas of constant turning or pivoting, this grade is essential.

  • Military Grade (Extreme): The ultimate solution for maximum longevity and extreme environments—think outdoor steps subject to salt, oil-soaked mezzanines, or areas exposed to severe weather and chemical washdowns. These materials offer maximum longevity and resilience under almost impossible conditions, representing the pinnacle of industrial grade traction solutions.

B. The Carrier Film and Adhesive Resilience

The strongest grit is useless if the tape lifts. The carrier film—the vinyl or polymer substrate the grit sits on—must be dimensionally stable. This means it resists shrinking or curling, which is often caused by temperature fluctuations or exposure to cleaning solvents. The adhesive is equally critical; it must be aggressive and specialized:

  • Aggressive Adhesives: For difficult surfaces like porous concrete, worn wood, or metal surfaces covered in rust-inhibiting paint, you require adhesives formulated to bite into irregular textures and resist moisture ingress. We often use solvent-based acrylic adhesives that create a mechanical bond with these rough surfaces, far superior to simple rubber-based glues.

  • Chemical Resistance: In many facilities, the biggest threat isn't traffic, but chemicals. Hydraulic fluids, cutting oils, solvents, and harsh floor cleaners can cause low-quality adhesives to break down. Choosing a chemical-resistant adhesive coated floor tape is non-negotiable in maintenance bays or machining centers.

III. The Jessup Solution Matrix: Matching Tape to the Hazard

Jessup’s product lines are designed to address every unique floor condition, ensuring you apply the right solution every time.

1. The Industrial Workhorse: Safety Track® Grit

  • Problem Solved: High-traffic industrial zones, oily areas, stairs, and ramps.

  • The Science: Utilizes aggressive mineral grit (aluminum oxide) bonded to a heavy-duty vinyl carrier. This is your go-to for maximum CoF and resistance to chemicals and industrial fluids.

  • Specific Examples: Loading dock ramps, exterior fire escapes, facility perimeter steps, heavy equipment footboards.

2. The Gentle Giant: Flex Track® Soft Touch

  • Problem Solved: Areas requiring excellent wet-area grip but where people may be barefoot or wearing non-traditional footwear.

  • The Science: This isn't grit; it's a soft, textured, rubberized material. It ensures safe footing without the abrasion of traditional Safety Track® Grit.

  • Specific Examples: Locker rooms, changing areas, boat decks, hospital corridors, pool surrounds. The human factor here is key—it protects skin and delicate shoe materials while preventing slips.

3. The Resilient Grip: Safety Track® Rubberized

Let's face it, sometimes you need a blend of qualities. You need something tough enough to handle a work boot, but maybe it's in an area where someone might occasionally walk through in socks or bare feet—think a changing station near a machine shop, or light industrial steps leading to a break room. This is where the Safety Track® Rubberized line steps in. It solves that tricky problem of high-abrasion areas that still need a touch of comfort. The science behind it is a durable, textured PVC film that manages to deliver a genuinely robust grip that’s completely resilient to tearing and peeling under stress. It gives you the longevity you expect, but with a gentler feel than our aggressive grit tapes. You'll find this working perfectly for things like emergency exit routes, the back steps of a retail store, or maybe temporary walkways where you need quick, dependable traction without the commitment or abrasion of a permanent grit solution.

The Role of Customization: Beyond the Roll

Here's an insider tip: you don't always need to order a giant roll of tape and cut it yourself. Trying to apply grip tape to unique surfaces—like the oddly shaped footboards on specialized machinery or the exact width of a particular staircase tread—can lead to wasted material and a messy, unprofessional installation. That's why we heavily lean into customization. Jessup’s whole history is built on this; we specialize in die-cut custom shapes and treads that arrive perfectly sized. This means zero waste and a clean, seamless application every time, even for those odd-shaped platforms. It’s a huge win for any lean operation, letting your team focus on application rather than measuring and cutting, and it’s a service built right into our 65 years of material experience.

IV. Installation & Maintenance for Maximum Lifespan

Even the world's most scientifically advanced heavy duty floor grip tape will fail if you slap it onto a dirty, cold floor. Installation isn’t rocket science, but it demands attention to detail. This builds massive E-A-T because we know the product is only as good as its application.

A. Surface Preparation: The Non-Negotiable Step

The failure of anti-slip tape is almost always adhesive failure, and that starts with poor preparation.

  • Clean & Degrease: The surface must be completely free of oil, grease, dust, paint chips, and debris. Use an industrial-grade cleaner or degreaser relevant to the substrate (e.g., strong solvent for metal, alkaline cleaner for concrete).

  • Test for Porosity: If you’re installing anti slip tape on concrete, check its porosity. A few drops of water should quickly soak in. If water beads, the concrete has been sealed or treated, and you must abrade that layer before proceeding.

  • Prime (The Insurance Step): For porous or chemically challenging surfaces, a primer or edge sealer should be used. This essentially fills the pores in the substrate, giving the tape's adhesive a perfectly smooth, chemically stable surface to bond to. It’s like adding extra insurance for critical installations.

B. The Role of Temperature and Timing

The next piece of the puzzle, and this is crucial, involves temperature and patience. The tape's adhesive bond—that initial sticky grab—is incredibly sensitive to how hot or cold the surface is. We strongly recommend you stick to the manufacturer's recommended ambient and surface temperature range, which usually means keeping things above 10{C} (or 50{F}). Honestly, if you try applying the tape when the concrete slab is freezing, you're essentially ensuring premature failure. The adhesive can’t flow and grab the pores properly, and that initial, foundational bond is compromised from the start.

Now, once the tape is perfectly placed, don't rush it. Yes, traffic might be possible right away, but the strongest, most dependable chemical bond needs time. We call this the cure time. Give the adhesive anywhere from 24 to 72 hours to fully set up and achieve its maximum strength. This isn't just a technical detail for the installer; it's a scheduling communication point you absolutely need to pass along to your operations manager so they know when that area is truly ready for heavy abuse.

C. Maintenance: Keeping the CoF High

Finally, let’s talk about keeping the Coefficient of Friction (CoF) high. If your industrial grip tape is clogged with oil, rubber dust, or packed-in dirt, it can't actually do its job. It loses its bite. That means regular cleaning is mandatory, not optional.

When you clean it, watch out for harsh chemicals. Do not use aggressive solvents; they can seriously degrade the adhesive over time, causing the tape to lift prematurely. Just stick to mild detergents and water—simple is often better here. For the tough stuff, you'll need to get proactive. Use a stiff nylon brush or a medium-bristle deck brush. Don't just wipe; you need to genuinely scrub and agitate the surface to loosen any embedded debris trapped deep within the grit valleys. That ensures the tape stays rough and effective, doing the safety work you paid for.

Conclusion: Invest in Certainty, Not Chance

You have a choice to make whenever you spec a safety material: do you buy the cheapest product and cross your fingers, or do you invest in a solution engineered by decades of real-world use? For over 65 years, Jessup Manufacturing has been obsessed with making materials that absolutely will not fail under pressure. We’ve seen every nasty application and every challenging surface imaginable, and we’ve built our lines to overcome them.

When you choose our Safety Track® or Flex Track® lines, you aren't just buying tape; you are investing in a tested, guaranteed industrial safety solution designed to meet the toughest standards. We’re selling certainty—certainty in compliance, certainty in performance, and certainty that your safety investment will pay off.

If you’re facing a particularly difficult outdoor ramp, a chemically exposed washdown area, or any spot where failures simply aren’t an option, stop guessing. Consult our experts today. We'll use our material science knowledge to help you explore the exact system you need to ensure your floors are safe, compliant, and durable long after the competition has crumbled.

2025-09-30 08:30:00

Best Outdoor Overlaminate: Choose ARMORLam® for Guaranteed Durability

If you work in outdoor advertising, you know the pain. You’ve put hours into a stunning, vibrant graphic—perfect colors, high resolution, flawless print. You install it on a brick wall, a vehicle, or a sidewalk. A few months later, the client calls. The color is washing out, the image is scratched, and the edges are lifting. Your reputation takes a hit, and you’re looking at costly rework.

The culprit is almost never the ink. It’s the material covering the ink: the outdoor overlaminate.

This film is the single, silent barrier between your expensive print job and the destructive reality of the outside world. It has to withstand constant UV radiation, abrasive weather, temperature swings, and sometimes, even foot traffic. Choosing the best outdoor overlaminate isn't an afterthought; it’s a critical engineering decision that dictates the lifespan, liability, and profitability of your entire project.

Let's break down the science of protection, the specific threats you need to neutralize, and how a heavy-duty system like ARMORLam® ensures your graphics deliver guaranteed durability.


The Triple Threat: Why Outdoors is Brutal

Indoor graphics face humidity and cleaning crews. Outdoor graphics face a gauntlet of forces working simultaneously to destroy your print. To choose the right overlaminate, you first have to clearly identify the three main threats your material must neutralize:

1. The Solar Attack (UV Degradation)

This is the biggest killer. Sunlight contains intense ultraviolet (UV) radiation. Even the best inks will eventually fade, chalk, and lose their vibrancy when unprotected. UV exposure also causes standard, unprotected vinyl to become brittle and crack, starting that inevitable edge-lift that ruins the whole graphic.

A high-quality outdoor overlaminate is engineered with powerful UV inhibitors built into the film’s chemistry. This barrier acts like industrial-strength sunscreen, absorbing the damaging radiation before it reaches the ink or the primary vinyl substrate. When evaluating materials, you must insist on specific guarantees regarding long-term UV durability. If the material doesn't explicitly advertise excellent UV stability, assume it will fail prematurely.

2. Physical Warfare (Abrasion and Impact)

Think about where outdoor graphics live: on vehicle wraps getting pelted by road debris, on public murals scraped by tree branches or passersby, or on sidewalks subjected to thousands of abrasive footsteps. Standard films cannot handle this physical abuse.

You need a thick, heavy-duty overlaminate, often constructed from specialized PVC or even polycarbonate, designed for physical toughness. This thickness creates a sacrificial layer—a durable shield that takes the damage, protecting the printed image beneath. Without this durable layer, a simple power washing or a few weeks of heavy rain can destroy the integrity of your image.

3. Environmental Stress (Temperature and Moisture)

Outdoor temperatures don't just fluctuate; they swing violently. A graphic on a black metal truck in the Arizona sun can hit 180 degrees Fahrenheit (over 82 degrees Celsius), then drop fifty degrees during an evening rainstorm. This extreme cycling stresses the adhesive bond and the vinyl film itself.

A cheap film will shrink, curl, and crack under this stress. The best outdoor overlaminate systems are designed for dimensional stability, meaning they resist shrinking even when the temperature swings widely. This stability is critical for preventing the edges of your graphic—the weakest point—from lifting and inviting moisture beneath the film, which quickly leads to catastrophic failure.


ARMORLam®: Engineering Protection into Your Graphics

When we talk about guaranteed longevity, we're talking about systems like the ARMORLam® line. This isn't just a basic film; it’s a range of highly specialized overlaminates designed to solve the specific threats detailed above.

The secret is having options tailored to the hazard, not just one film for everything.

PVC-Free Options for Sustainability and Clarity

Many print bureaus are moving away from PVC for environmental reasons or for highly critical applications where plasticizer migration is a concern. ARMORLam® offers excellent PVC-free alternatives that deliver the required toughness without the traditional material concerns. These newer films often boast superior clarity and dimensional stability, making them fantastic for long-running, demanding signage.

Heavy-Duty Thickness for High Abrasion

If your project involves floor graphics, public stairwells, or exterior walls in high-vandalism areas, you need a heavy-duty option. The thicker the overlaminate, the longer the printed image remains protected from physical abuse. You are buying time and resilience. When quoting these jobs, always factor in the material thickness—it's the primary indicator of protection against impact and foot traffic.

Built-in Safety: Anti-Slip Protection

For any graphic applied to a floor or a walkable surface (like an exterior ramp or sidewalk), safety becomes non-negotiable. You can't just use a thick, glossy film; that's a liability waiting to happen.

The best outdoor overlaminate systems include certified anti-slip options. These films have a microscopically textured surface that provides the necessary Coefficient of Friction (CoF) to meet stringent safety standards. This protection ensures that your beautiful sidewalk advertising remains safe and compliant, even when wet. Ignoring the anti-slip feature is arguably the single riskiest decision an agency can make on a floor project.


Practical Application: The Printer's Best Practices

For print bureaus and installers, choosing the right material is only half the battle. Here are a few insider tips for maximizing the lifespan of your protected outdoor graphics:

  • Use the System: Always pair the overlaminate with the manufacturer's recommended base vinyl and adhesive. The entire system—adhesive, vinyl, and overlaminate—is engineered to work together to handle the temperature and environmental stress. Mixing brands creates unpredictable stress points and voids most performance guarantees.

  • Edge Sealing is Critical: The vast majority of failures start at the edge. A properly sealed edge prevents moisture from wicking under the graphic. For highly exposed applications (marine, high-pressure washing), consider edge sealing or wrapping the material around the substrate for a mechanical lock.

  • Post-Heat Application: For vehicle wraps and graphics applied over contours or rivets, the overlaminate must be properly post-heated according to the film manufacturer's guidelines. This heating process sets the memory of the film, preventing it from pulling back from the challenging curve and maintaining a long-term bond.

Final Word: Buy Resilience, Not Just Film

When you bid on an outdoor advertising job, you are selling resilience. Your client isn't paying for ink on vinyl; they are paying for a graphic that will survive sun, rain, and scuffs for the promised duration. The film you choose for the surface dictates whether you deliver on that promise.

Generic, medium-term laminates simply cannot handle the punishing reality of the outdoors. They leave your high-value prints exposed to the triple threat of UV, abrasion, and intense temperature shifts. If you are done dealing with failed installations and the expensive callbacks that follow, it's time to step up your material choice.

We built this specialized line to give you genuine assurance: guaranteed UV durability, certified anti-slip safety, and, yes, even great PVC-free options if sustainability is a priority. This is how you protect your bottom line and earn a lasting reputation for quality.

Got a tough outdoor job coming up? Consult our experts. We'll help you explore the ARMORLam® heavy-duty range so you know your graphics are safe, no matter what the elements throw at them.

2025-09-29 11:29:00

Printable Vinyl for Walls, Floors & Sidewalks: Selection Guide

If you work in large format graphics, you know the job isn't done when the ink dries. That’s just the start. The real challenge comes when your beautiful design has to meet the harsh reality of the environment—be it the texture of brick, the grime of a sidewalk, or the constant scrubbing of a retail floor.

For years, putting graphics on anything other than a smooth poster board was a nightmare of complex adhesives, bubbling vinyl, and ruined paint jobs. Now, thanks to innovations in specialty films, the world truly is your canvas. But you can't use a one-size-fits-all solution. Choosing the best printable vinyl for walls is vastly different from selecting material for a wet concrete sidewalk.

This is about understanding the science of adhesion and durability. We need to look at what separates exceptional surface graphic media, like the Print N’ Go™ family, from standard vinyl, and how to match your film to the exact texture and traffic level of the substrate. This knowledge is the key to creating graphics that not only look vivid but also adhere reliably, remove cleanly, and stand up to the elements, indoors or out.


The Adhesion Matrix: Why Surfaces Are Your Biggest Enemy

In the simplest terms, every surface is different. The smooth, painted drywall in a corporate lobby is a high-energy surface that wants to bond easily. The rough, porous texture of a concrete sidewalk is a low-energy surface that actively resists adhesion. Your printable media must be engineered to overcome this.

The crucial concept here is the "wetting out" power of the adhesive. When you stick a film, the adhesive must flow into every tiny pore and contour of the substrate. If you use a standard, thin adhesive on a sidewalk, the glue only touches the peaks of the concrete texture, leaving the valleys full of air. That air pocket is an immediate point of failure where the graphic will fail, bubble, or lift.

That's why specialized media, like those in the Print N’ Go™ range, are your go-to solution. They employ thicker, highly aggressive adhesives designed specifically to flow out and fill those porous textures. They allow your graphics to grab onto almost any surface—be it smooth walls, rough concrete, or even stairs—and hold tight in both wet or dry environments.


Walls: The Art of Sticking and Releasing

When a client asks for printable vinyl for walls, they usually mean two things: a flawless final look and zero damage upon removal. This application is unique because the adhesive must be robust enough for long-term display but gentle enough not to rip the paint or tear the drywall facing when the campaign ends.

The material must be dimensionally stable—meaning it won't stretch during installation—and often needs to be breathable, allowing air bubbles to escape, especially on large-scale murals.

The key to successful wall graphics lies in the balance of the adhesive. If the graphic is going up for a year, you need a high-tack permanent but clean-removing film. If it's a short-term promotion, a low-tack repositionable film is a better choice. Choosing the wrong tack level is the single fastest way to damage property or ruin a printed graphic. You have to treat the wall not just as a canvas, but as an asset that must be protected.


Floors: Where Liability Meets Longevity

Floor graphics are the most challenging application in the entire graphics industry because they are a liability hazard wrapped in an advertising medium. Here, the challenge isn't just adhesion; it's durability and safety.

Your film must meet three non-negotiable requirements:

  1. Extreme Abrasion Resistance: Floors endure constant foot traffic, heavy equipment, and regular cleaning—a continuous cycle of wear. The film must be protected by a heavy-duty, certified overlaminate that resists scuffing and penetration.

  2. Adhesion to Low-Energy Surfaces: Floors are often sealed concrete, polished tile, or rough asphalt—surfaces that resist sticking. The film’s adhesive must be specially formulated to achieve maximum wet-out on these difficult substrates, ensuring the edges stay down to prevent tripping.

  3. Slip Resistance: This is the most critical compliance point. The finished graphic, including the print film and the protective overlaminate, must be tested and certified for slip resistance (Coefficient of Friction, or CoF) under applicable standards, like NFSI or ASTM. Failure here creates a direct safety risk.

Using a specialized system, like one of the Print N' Go™ floor media options, that combines a high-grab adhesive with a certified, high-traction overlaminate is the only reliable way to produce floor graphics for retail or public wayfinding.


Sidewalks and Asphalt: The Extreme Outdoor Test

If a floor graphic is tough, a sidewalk graphic is brutal. This is the ultimate test of durability and adhesion.

Outdoor concrete is rough, porous, constantly exposed to UV radiation, freeze-thaw cycles, and ground-in debris (mud, gravel, road salt). To succeed here, you need a material that is engineered to be incredibly flexible, allowing it to conform perfectly to the extremely rough texture of asphalt or concrete—like molding clay—to achieve 100% contact.

Often, these films use a foil or heavy aluminum base, which provides structure and conformability while allowing the film to be hammered or pressed deep into the surface texture. This ensures that the specialized adhesive can fully wet out the substrate, locking the graphic in place against the harshest outdoor elements. You're essentially creating a permanent bond until the graphic is physically removed. This capability makes films like this ideal for outdoor event marketing, temporary safety messaging on construction sites, or long-running outdoor wayfinding signs.


The Printer's Toolkit: Why Material Choice Saves Money

For print shops, selecting the right film saves more than just headaches—it saves money. Material failure is the single greatest cause of lost profit in wide-format graphics.

Think about the time spent on installation. If you send a crew out to install a mural using a cheap film that wrinkles or bubbles, they spend hours re-doing the job, wasting labor and material. By providing your installers with specialized media that guarantees reliable adhesion on the first try, you massively increase the efficiency and profitability of every job.

Furthermore, a versatile product family means less inventory to manage. If you can use one core media type for walls, floors, and basic outdoor use, your purchasing becomes simpler and more cost-effective. The Jessup Print N’ Go™ range, trusted for delivering vivid clarity and durable results, is designed to give you that kind of efficient, cross-platform capability.

Final Word: Engineering Your Canvas

The era where graphics were limited to flat, smooth walls is long gone. Today, the entire environment is available to communicate your brand, your message, or your safety requirements.

To make the most of this opportunity, you must engineer your film choice to meet the demands of the substrate. Whether you need a gentle film for printable vinyl for walls or a tough, conformable media for a rough sidewalk, the secret lies in matching the adhesive chemistry and the film thickness to the texture and traffic.

Stop wasting time and money on cheap vinyl that fails prematurely. Invest in media that is designed to adhere reliably, remove cleanly, and stand up to the abuse of the real world, indoors and out.

Ready to expand your capabilities and ensure your next graphic project is a durable success? Contact our media experts today to discuss the best, certified Print N’ Go™ film solution for your specific application challenges.

2025-09-25 11:11:00

36 Grit vs 46 Grit vs 60 Grit Anti Slip Tape—Which is Right for Your Hazard Zone?

If you've ever spent a day comparing specs for anti slip tape grit, you know that picking the right one feels like a small war fought with microscopic numbers. You’re looking at 36 grit, 46 grit, and 60 grit, and on the surface, they all look like rough tape. So, what’s the big difference?

To be honest, that difference is everything. Choosing the wrong grit isn't just a waste of money; it's a critical safety failure waiting to happen. In the world of OSHA compliance and hazard control, the size of the abrasive particle determines how well the tape resists heavy oils, corrosive marine environments, or the flexing of a diamond plate staircase.

We need to move past the simple idea of "roughness" and talk about material engineering. Let's break down exactly what each of these top-tier Safety Track grades—36, 46, and 60 grit—is designed for, where they belong in your facility, and why the adhesive chemistry is just as crucial as the particle size.


Understanding the Enemy: Grit Size vs. Hazard Level

In the world of abrasives, the grit number is inversely related to the particle size. The rule is simple: The lower the number, the larger and more aggressive the particle.

  • Low Grit (e.g., 36): Think of it as industrial gravel. Large, widely spaced particles designed to chew through thick contaminants like mud or ice.

  • Medium Grit (e.g., 46): This is the heavy-duty all-rounder. A slightly finer particle count designed specifically to fight heavy liquid contaminants like diesel fuel or oil.

  • Higher Grit (e.g., 60 and up): A finer, more densely packed particle count. It provides a smoother texture but maintains excellent traction on clean or irregularly shaped surfaces.

Your decision must be based on the three factors that define your hazard zone: Contaminant, Environment, and Substrate.


Heavy Duty Champion: The 36 Grit Aluminum Oxide Grade

When you are facing the absolute worst conditions, you don't compromise. You reach for the 36 grit.

This is the nuclear option for anti slip tape grit. This grade uses the largest aluminum oxide particles, meaning the grit profile is exceptionally aggressive. This tape isn't for an office hallway; it’s for areas where the friction must be powerful enough to engage a work boot sole through layers of dirt or grime.

Where 36 Grit Belongs:

  • Construction Equipment: Steps and ramps on heavy machinery (excavators, bulldozers). These surfaces see constant mud, snow, and large debris. The large grit profile provides the necessary aggressive bite.

  • Marine & Offshore: Saltwater and high moisture environments.

  • Heavy Industrial Ramps: Areas that see consistent vehicle traffic or heavy, dirty loads.

The engineering behind this tape is tailored for extremity. It features a 3.9 mil permanent acrylic adhesive (PE ADH0061). Why acrylic? Acrylic adhesives generally offer superior outdoor durability and UV resistance, which is mandatory for equipment that spends its life exposed to the elements. This heavy-duty composition ensures the tape won't break down under constant environmental stress, giving you the extreme traction needed in true heavy-duty applications.


The Chemical Fighter: The 46 Grit Rubber Adhesive Solution

The 46 grit tape sits firmly in the heavy-duty category, but its performance profile is slightly different and, critically, involves a different adhesive chemistry designed for chemical resilience.

The 46 grit particle size is a superb all-purpose industrial abrasive. It offers incredible grip without the sheer destructive force of the 36 grit. But the true engineering story here is the adhesive.

This grade typically utilizes a 2 mil permanent rubber adhesive (PE ADH0013). This rubber adhesive is less susceptible to immediate breakdown from certain hydrocarbon liquids compared to some acrylics, making it the superior choice when the contaminants are liquids like oil, diesel fuel, or standard lubricants.

Where 46 Grit Belongs:

  • Oil & Gas Refineries: Walkways, platforms, and stairways where spills are chronic.

  • Trucking and Maintenance Bays: Areas that see constant exposure to grease and diesel fuel.

  • Manufacturing Assembly Lines: Where oil or coolant overspray is a regular occurrence.

The 46 grit anti slip tape grit is your chemical defense. It’s designed not just to provide friction, but to hold fast to the substrate even while under attack from harsh industrial liquids. If your main hazard is liquid contamination, the rubber adhesive's tenacity in that environment is a primary purchasing consideration.


The Flexible Performer: The 60 Grit Conformable Grade

When you move to 60 grit, the game changes entirely. This is where the focus shifts from fighting thick contaminants to mastering challenging substrates.

The 60 grit particle is noticeably finer and much more densely packed. This provides excellent traction, but it's the substrate and the film backing that define this tape’s application. This tape is built to be conformable.

Mastering Irregular Surfaces:

  • Diamond Tread Plate: This is the classic challenge. Standard, stiff tapes trap air over the peaks of the tread and create weak adhesion points in the valleys. This 60 grit grade, paired with a specialized foil backing (Aluminum ADH0004), is flexible enough to stretch and mold around those contours without wrinkling or lifting.

  • Ladders and Curved Surfaces: It adheres securely around pipes, curved steps, and narrow ladder rungs, maintaining 100% contact.

  • Commercial/Office: Its finer profile is generally smoother for lighter shoe types and easier on cleaning equipment, making it a great indoor/outdoor commercial-grade choice where high durability is needed, but the application surface is not flat.

The chemistry here is back to a permanent acrylic adhesive, but the flexibility of the film backing is the real star. This allows the tape to seal out moisture and debris by achieving full contact with the substrate, guaranteeing a long-lasting, reliable bond on surfaces that would instantly destroy a rigid tape.


The Adhesion Equation: Why the Glue is the True Hero

It's easy to focus solely on the anti slip tape grit, but a 36 grit particle is useless if the tape peels off the floor. As noted in the 46 grit breakdown, the adhesive chemistry is half the battle.

You have three distinct adhesive systems at play: permanent acrylic (used on 36 and 60 grit) and permanent rubber (used on 46 grit).

  • Acrylic Adhesives: Generally superior in terms of long-term UV resistance and temperature tolerance. They are the best choice for exposed outdoor applications where the sun and heat are the main environmental threats (36 grit marine use).

  • Rubber Adhesives: These tend to have a higher initial tack (instant grab) and show better resilience against non-polar solvents and oils, making them the superior choice for fuel/oil contamination zones (46 grit refinery use).

Procurement teams need to align the adhesive's weakness with the environment's primary threat. If the biggest risk is sun rot, you want acrylic. If the biggest risk is a diesel spill, you want the specialized rubber formulation.


Final Compliance Check: Making the Right Call

Choosing the correct anti slip tape grit is a matter of calculating risk versus reward. You must select the material that provides the highest CoF (Coefficient of Friction) without causing maintenance or substrate issues.

Grit Grade Primary Hazard Profile Adhesive Type Key Application Zone
36 Grit Extreme debris (mud, snow, ice) Permanent Acrylic (UV Resistant) Construction, Heavy Industrial, Marine
46 Grit Liquid Contaminants (Oil, Diesel, Grease) Permanent Rubber (Solvent Resistant) Oil & Gas, Maintenance Bays, Factories
60 Grit Irregular/Textured Substrates Permanent Acrylic (Conformable Backing) Diamond Plate, Ladders, Commercial Stairs

Never purchase a general-purpose tape for an extreme environment. The 36 grit is necessary for a greasy construction step, the 46 grit is essential for fighting chemicals, and the 60 grit is the only practical solution for diamond plate.

Ready to stop guessing and upgrade your hazard control strategy with the correct, high-performance Safety Track anti slip tape grit? Consult our compliance experts today to ensure your material choice perfectly matches your environmental and substrate challenges.

2025-09-22 15:44:00

How Retail Store Floor Graphics Drive Sales and Define Your Brand

Walk into any successful retail store—a high-end department store, a specialty boutique, even a busy grocery chain. What's the first thing you notice? Probably the lighting, the displays, maybe the product itself. But your feet? They're already on the most valuable, yet most overlooked, piece of marketing real estate in the entire space: the floor.

For years, the floor was considered just the background. Now, it's a dynamic canvas. Retail store floor graphics have evolved from being simple welcome mats to becoming essential tools for everything from driving impulse buys to reinforcing long-term brand identity. If you're a marketing manager or a visual coordinator, you have to treat the floor with the same strategic importance as your front window display.

But placing graphics on the floor comes with a unique set of brutal challenges: constant foot traffic, abrasive cleaning routines, and liability concerns. Let's break down how to use floor graphics strategically, what materials make them last, and how to successfully manage them for both fleeting seasonal promotions and permanent branding.


The Power of the Path: Why We Look Down

We spend most of our time in stores looking horizontally or vertically, but when we walk, our brains are constantly processing the path immediately ahead. This is a built-out human instinct for safety. A great floor graphic intercepts that instinct, turning a passive action (walking) into an active moment of engagement.

Think about the customer journey. You use hanging banners for awareness, and shelf talkers for the final decision. Floor graphics are brilliant because they fill the crucial middle ground: wayfinding and interruption. They lead the customer directly to a new product display, highlight a sale, or, better yet, stop them dead in their tracks to consider a related item they weren't planning to buy. This power to interrupt and guide without using loud, obtrusive signage is absolutely priceless in a crowded store.

To be honest, a well-placed graphic is often more effective than an employee, because it’s always present, silent, and positioned exactly where the customer is looking.


Seasonal Promotions: Go Hard, Get Out Clean

Most of the demand for retail store floor graphics revolves around seasonal campaigns, holiday sales, or short-term product launches. These graphics have a specific, non-negotiable mission: they must look absolutely fantastic for three to six weeks, and then they must come up cleanly without damaging the flooring underneath.

This is where material choice becomes your most critical decision. You can’t just use any old vinyl. You need a film engineered for clean, temporary removal. If your team spends hours scraping up residue and then has to patch up tile damage, the labor cost for that temporary promotion skyrockets, and the whole campaign loses its profitability.

Look for graphics made with balanced, removable adhesives. They must be aggressive enough to resist edge lifting (you don't want a trip hazard!) but formulated so the adhesive matrix stays cohesive when pulled up, leaving zero residue. This reliability allows you to swap out graphics quickly between campaigns—think Black Friday to Christmas, or Valentine's Day to Spring Fashion—with minimal operational disruption.


Permanent Branding: The Foundation of Your Aesthetic

While temporary graphics drive sales, permanent branding on the floor reinforces your store's entire identity. These graphics—like logos near the checkout, directional arrows built into the store's flow, or large brand messaging in a major atrium—must meet an entirely different set of durability standards.

These aren't coming up next month. They have to survive years of constant abuse.

The primary enemy of permanent floor graphics is abrasion. Every shopping cart wheel, every shoe sole, and every pass of the floor scrubber acts like sandpaper. To combat this, you need a system, not just a sticker.

The graphics must be protected by a heavy-duty, certified overlaminate that is specifically rated for high-traffic floor use. This is often a tough PVC or polycarbonate film that is thicker, designed to resist scuffing, and provides a slip-resistant surface. This protection ensures two things: first, the printed image underneath remains vivid and unscratched; and second, the graphic remains slip-resistant, protecting you from potential liability issues. You simply cannot skimp on the laminate for permanent applications.


Managing Liability: The Slip-Resistance Mandate

In retail operations, the floor is an inherent liability. A graphic that curls up or becomes too slick is a major safety hazard. This isn't just theory; it’s OSHA compliance and risk management 101.

Every retail store floor graphic used in areas open to the public must adhere to strict slip-resistance standards. In the US, this is often verified by tests that measure the Coefficient of Friction (CoF), typically using NFSI or ASTM standards.

When you purchase a film or a graphic system, you must insist on documentation that the finished assembly (the print film plus the overlaminate) meets the high-traction requirements for wet and dry conditions. If the graphic is going near a doorway or a beverage area, the wet rating is especially critical. This protective step shouldn't be seen as an annoyance; it’s an essential part of responsible merchandising that keeps your customers safe and your store protected.


The Visual Merchandiser's Toolkit: Tips for Impact

For the visual merchandiser, floor graphics offer creative freedom unmatched by traditional wall signage. Here are a few tricks that truly work:

  • The Focal Point Stop: Use a large, round, or uniquely shaped graphic immediately in front of a major display. Trust me, those curved lines just pull the eye right in and basically tell the customer, without a word, to pay attention right now.

  • Flow Enhancement: Try using repetitive, smaller graphics (things like footprints or directional arrows) to gently nudge the customer along a specific route. You're subtly encouraging them to walk toward a desired area—usually where the higher-margin goods are sitting.

  • The "Magic Carpet" Effect: Use long strips of floor graphics to connect two separate departments or products. For example, a sports shoe graphic leading from the apparel section to the footwear wall. It subtly links related items and encourages cross-selling.

Ultimately, these tools allow you to use the floor to create an immersive, dynamic environment. The key is to remember that the customer is moving. Your graphic has to capture their attention in motion and translate that fleeting glance into action.

Final Word: Stop Treating the Floor Like a Second Thought

Your marketing spend on indoor advertising solutions deserves to be backed by materials that reflect quality and longevity. Whether you are installing decals for a high-traffic lobby or a long-running campaign, choose materials that are engineered for the reality of the interior environment—a reality that includes humidity, cleaning chemicals, and the need for clean, stress-free removal. Durable vinyl with a balanced adhesive isn't just a material; it’s an assurance.

Ready to invest in floor graphics that perform, last, and remove cleanly? Contact our media experts today to discuss high-traction, durable vinyl solutions tailored for the retail environment.

2025-09-19 12:15:00

The Polyethylene Problem: Adhesive Solutions for Low Surface Energy Materials

If you work in manufacturing, engineering, or even advanced labeling, you know the frustration well: everything bonds to metal, glass, and paper perfectly, but the moment you try to stick something permanent to polyethylene (PE) or polypropylene (PP), it fails. It peels up, it slides off, or it just never truly grabs hold.

This isn't a flaw in your product; it’s a physical challenge rooted in material science. You're dealing with the headache of low surface energy materials.

In simple terms, these plastics—the stuff of car bumpers, appliance housings, fuel tanks, and countless consumer goods—are chemically structured to repel everything, including glue. It's the engineering equivalent of trying to stick a label to Teflon. For engineers and OEM manufacturers, solving this bonding puzzle isn't optional; it's mandatory for production success.

Let's break down exactly why these difficult plastics repel adhesion, what specialized tools you need (hint: it involves high tack adhesives), and the surface treatments that finally make these materials stick.


The Root Cause: Understanding Low Surface Energy

To understand why your standard adhesives fail on PE and PP, you have to think about surface energy, measured in dynes per centimeter.

Imagine the molecules on the surface of a material. High surface energy materials (like steel or glass) have molecules that are tightly packed and "thirsty." They want to attract and hold onto adhesive molecules, allowing the glue to flow and wet out the surface perfectly. This results in a strong bond.

Low surface energy materials, however, are hydrophobic and chemically inert. Their molecules are relaxed and repellant. The adhesive can’t flow out across the plastic—it beads up, just like water on a freshly waxed car. If the adhesive can't achieve sufficient wetting, the total contact area is minimal, and the bond strength is essentially zero. Polyethylene (PE) and polypropylene (PP) are notorious for this, often having surface energy values below $35$ dynes/cm.

Engineers spend careers wrestling with this problem because these plastics are incredibly useful everywhere else—they’re cheap, durable, lightweight, and highly chemical resistant. We need them, but they just refuse to cooperate with standard glue.


Specialized Chemistry: The High Tack Adhesive Advantage

Since we can't change the fundamental nature of the plastic (not easily, anyway), the adhesive has to compensate. This is where high tack adhesives, specifically formulated for difficult bonding challenges, come into play.

The general-purpose adhesives you find on most tapes and labels use standard chemistry. To tackle low surface energy materials, the adhesive must have two key characteristics:

  1. Lower Surface Tension: The adhesive itself needs to be formulated with a very low surface tension so that it can overcome the repulsion of the plastic. It needs to "act desperate," flowing out quickly and thoroughly to maximize the contact area, even on those relaxed plastic molecules.

  2. Immediate Grab (High Tack): Adhesives for these materials are often highly aggressive and thick. They are designed for an incredibly high initial tack, meaning they grab immediately and hold tight. This aggressive initial pull is essential to build the bond before the plastic has a chance to fully reject the adhesive.

For manufacturing engineers, selecting a certified high-tack adhesive is the first, most crucial step. You are selecting a product that has been chemically engineered to succeed where standard acrylics or rubbers will always fail.


When High Tack Isn't Enough: Surface Treatment Options

I’ve met plenty of engineers who’ve tried every high-tack tape on the market and still couldn't get the desired bond strength. Why? Because sometimes the plastic's surface energy is simply too low, or the surface is contaminated with mold release agents used during production.

In these cases, you can't just rely on the adhesive; you have to change the physical properties of the plastic itself. This is where surface treatment comes in, and to be honest, it's often the difference between a successful product and a line shutdown.

There are three primary methods engineers use to elevate the surface energy of these difficult plastics:

1. Plasma and Corona Treatment

This is a clean, highly effective method often used in large-scale manufacturing and packaging. The plastic is briefly exposed to an electrical discharge (corona) or charged gas (plasma). This treatment oxidizes the surface, adding highly charged, polar molecules to the top layer. In simple terms, it flips the surface from hydrophobic (water-repelling) to hydrophilic (water-attracting), suddenly making the plastic "thirsty" for the adhesive. The drawback? The effect is not permanent and can fade over time, sometimes requiring quick application of the adhesive after treatment.

2. Flame Treatment

Common in the automotive and plastics industries, flame treatment involves briefly running an open flame across the surface of the plastic. This causes rapid, intense oxidation and physically changes the top molecular layer, dramatically increasing surface energy. While highly effective for certain polymers, it requires precise control to avoid damaging the plastic itself.

3. Chemical Primers

This is often the go-to solution for aftermarket application or small-batch labeling. A liquid primer is wiped onto the plastic surface before the adhesive material is applied. These primers are essentially a thin layer of specialized chemicals that bond to the inert plastic on one side and offer a high-energy, chemically reactive surface on the other, creating a perfect landing strip for your high-tack adhesive. This is especially useful when dealing with hard-to-reach areas or pre-existing products.


Real-World Application: Where This Technology Shines

For industrial label producers and automotive suppliers, the ability to permanently bond to low surface energy materials isn't abstract—it's market access.

Consider a simple application: a permanent warning label on a polyethylene gas can. That label has to survive UV exposure, gasoline splashes, and temperature swings from the freezer to the hot sun. A standard label will curl and fall off within a month. Only a label using the correct high-tack adhesive (sometimes paired with a primer) will survive.

Or think about the automotive aftermarket. If you're designing a piece of trim, a decal, or a mounting bracket that needs to stick permanently to a PP bumper or PE dashboard, your failure rate will be astronomical without engineered adhesion. These high-tack solutions are what allow for secure, durable, and reliable attachment to components that are designed to resist everything else.

The reliability of these specialized adhesives allows OEM equipment manufacturers to expand their material palette, choosing lightweight, corrosion-resistant plastics without sacrificing the ability to secure important labels, gaskets, or secondary components.


Final Takeaway: The Investment in Guaranteed Adhesion

Wasting time and materials on failed adhesion is a cost few manufacturing operations can afford. The solution isn't to buy the stickiest looking tape; it's to invest in an adhesive solution that understands the chemical complexities of low surface energy materials.

Whether you opt for a specialized high-tack adhesive engineered for difficult plastics, or you choose to combine that adhesive with an effective surface treatment like chemical primers, the investment is in guaranteed performance.

If you are currently struggling with PE, PP, or any difficult polymer, stop guessing. Find an adhesion partner who can provide the chemically specific solution your application demands. That small change in material science is the key to unlocking major reliability gains in your entire production workflow.

2025-09-17 11:22:00

Indoor Advertising Solutions: Durable Vinyl for Decals, Banners & Graphics

Walk into any retail space, trade show floor, or corporate lobby, and you’re immediately immersed in a sea of visual communication. Banners hang from the ceiling, decals wrap the walls, and graphics cover the windows. That visual noise is how brands compete for attention.

But I’ll let you in on a secret: the vast majority of that vibrant, expensive signage is designed to fail.

Most companies opt for the cheapest material—the thinnest paper, the least durable film—thinking the indoor environment is inherently safe. They assume a static office wall or a corner window is immune to damage. That is a massive mistake. Indoor graphics face abrasion from cleaning crews, constant temperature fluctuations near entryways, direct UV exposure from large windows, and, worst of all, frequent changes that require clean removal.

If you’re serious about your brand presence, you have to move past disposable materials. You need advertising that reflects quality, lasts for months or years, and comes off cleanly when it’s time for an update. In simple terms, the foundation of effective, long-term indoor advertising isn't clever design; it’s durable vinyl.


Why "Indoor Only" Doesn't Mean "Easy"

When sourcing materials for decals, banners, and graphics, clients often tell me, "Oh, it's just going indoors, so anything will work." To be honest, that couldn't be further from the truth. The indoor environment presents its own set of brutal, specific challenges that can destroy cheap films in record time.

Think about the humidity. A retail store in Florida has completely different environmental factors than a corporate office in Arizona. These changes, especially near automatic doors or HVAC vents, stress materials. Cheap paper or basic monomeric vinyl will warp, curl at the edges (the dreaded "dog ear"), and eventually just crack. The moment a decal starts to curl, it stops being a professional ad and starts looking like neglect.

A quality, durable vinyl, like Jessup's specific film designed for these applications, combats these environmental shifts. Its polymer structure is engineered for stability, resisting the moisture and temperature changes that warp lesser materials. That stability is the difference between your seasonal promotion looking crisp through three months, or looking shredded after three weeks.


The Adhesive Dilemma: Sticking Power vs. Removal Power

This is often the trickiest part of the entire signage equation. You need a decal to stick reliably for years—to painted walls, glass, or finished wood—but when the event is over or the brand campaign changes, that graphic absolutely must come off without leaving behind sticky, frustrating residue or, worse, ripping the paint off the wall.

This is the adhesive dilemma. Standard permanent adhesives are often too aggressive for interior spaces, leading to damage. Conversely, temporary adhesives might lift spontaneously, especially near high-touch areas like product displays.

The solution lies in the specialized permanent acrylic adhesives used on premium durable vinyl. They are formulated for tenacious stick combined with clean removability. It's a high-wire act of chemistry. The adhesive is strong enough to resist the stresses of the material itself (preventing that edge curl) but balanced so it doesn't aggressively fuse with the substrate over time. That specific chemical formulation ensures that when you pull the vinyl, the adhesive matrix holds together and comes off in one clean piece, leaving the wall untouched.


Beyond Decoration: Graphics as Operational Tools

We often focus on decals and banners purely as promotional tools, but in many corporate and industrial settings, graphics are actually operational necessities. They act as wayfinding tools, brand standards, or temporary informational displays.

Consider a large university campus or a hospital. Graphics aren't selling anything; they're guiding people. They're telling you, "Entrance A," or "Path to Parking Garage." If that directional decal fades, peels, or gets scuffed into illegibility, it doesn't just look bad—it causes confusion and inefficiency.

In these environments, durability isn't a bonus; it’s mandatory. The durable vinyl must be able to withstand the constant, abrasive wipe-down of cleaning crews and the daily friction of people walking past. If your indoor graphics are the foundation for your wayfinding system, you need assurance that the material won't break down before the information it holds.

The Designer's Edge: Material Integrity and Print Quality

For the graphic designer, the film choice dictates the final look and feel of the product. Low-quality films, for instance, stretch like crazy when you try to apply them, which warps the entire graphic. Worse, they often have terrible opacity, letting the underlying wall color bleed right through your design. That kills the visual impact instantly, turning a beautiful design into a murky mess.

That's why reaching for a durable, high-quality vinyl is non-negotiable. It gives the design a much superior platform for a few key reasons:

  • Dimensional Stability: The film actually maintains its shape perfectly. Think about trying to line up a huge wall graphic—if the film stretches even slightly, the entire image is skewed, and your panels won't align. Quality vinyl prevents that distortion entirely, ensuring the final graphic looks crisp and true to your original design vision.

  • Opacity and Color: A good film acts like a blank canvas. It needs a high degree of opacity, ensuring your printed colors look vibrant, dense, and true, regardless of what color the wall is underneath. You need that color to pop, and a quality film guarantees it.

If you want your brand to scream "premium," you can't use bargain-bin materials. The vinyl is the carrier of the brand identity; treat it as such.


The Long View: Cost Savings in Maintenance and Labor

It's tempting to think that using cheap materials saves money, but if a graphic needs to be replaced three times in one year because the edges curled or it tore during cleaning, you've tripled your labor and material costs.

The long view shows that durable vinyl is the most cost-effective choice.

  1. Reduced Replacement Cycles: The product simply lasts longer, reducing the frequency of reprinting and re-installing.

  2. Minimized Labor Time: Clean, one-piece removal saves maintenance hours that would otherwise be spent scraping off residue or patching drywall damaged by aggressive glue.

  3. Brand Protection: Preventing damaged, peeling signage avoids the intangible but very real cost of poor brand perception. Your indoor graphics should consistently reinforce quality, not undermine it.

When you factor in labor—the time it takes a skilled professional to install a large graphic—the savings from using a reliable film that won't fail prematurely become impossible to ignore.

Final Word: Make Your Indoor Ads Last

Your indoor advertising solutions are often the most direct, final point of contact you have with a customer before they make a decision. They should be clear, beautiful, and absolutely resilient.

If you’re planning decals, banners, or graphics for a high-traffic lobby or a long-running campaign, choose materials that are engineered for the reality of the interior environment—a reality that includes humidity, cleaning chemicals, and the need for clean, stress-free removal. Durable vinyl with a balanced adhesive isn't just a material; it’s an assurance.

Ready to upgrade your brand's longevity and stop wasting money on graphics that fail too soon? Consult our materials experts today to discuss the optimal durable vinyl and adhesive combination for your next long-term indoor advertising project.

2025-09-15 15:38:00

Creative Uses for Glo Brite 7901 Promotional Grade PVC Film

We all know the serious side of photoluminescent film: those ultra-bright strips that guide you down a dark stairwell during a power outage. They save lives, and their performance standards are measured in hours, not minutes. But what if you could take that same fascinating glow technology and use it just for fun? Or for marketing?

That's the entire idea behind products like Glo Brite 7901 Promotional Grade PVC film.

This isn't the stuff used to meet strict fire code in a high-rise. This is a versatile, economical, and easy-to-use film designed for when you need a visible glow for a shorter period, purely for impact, flair, or temporary guidance. If you're a sign fabricator, an event planner, or a designer looking to add a unique visual effect, this film opens up a world of possibilities that traditional vinyl just can't touch.

Let's dive into why this specific type of photoluminescent film is a must-have in your creative toolkit, and how its unique properties make it ideal for quick, high-impact applications.


The Economics of Glow: Understanding Promotional Grade

The biggest mistake people make with glow products is confusing compliance film with creativity film. They are two different animals, and they carry very different price tags.

Safety-rated films are expensive because they are engineered to maintain a specific, measurable brightness (luminance) for 60 minutes, 90 minutes, and beyond, meeting rigorous UL or ISO standards. They are over-engineered for simple signage.

Glo Brite 7901 Promotional Grade PVC cuts right to the heart of economic efficiency. It’s built to deliver a noticeable, quick glow that is perfect for non-safety applications. You get a strong initial burst of light, measured at $13.3 \text{ mcd/m}^2$ (millicandelas per square meter) after the lights go out. That light stays visibly strong enough for up to an hour—perfect for an evening event, a temporary display, or a themed decal.

This focus on short-term impact means you get the dramatic visual effect of photoluminescence without the premium cost of materials meant for long-term survival systems. It’s the difference between buying a sports car for the track and a fun, reliable hatchback for weekend errands.

The Physical Specs: Why PVC is Perfect for Decals and Signs

The film’s construction is key to its versatility in the sign industry. We’re talking about an $18 \text{ mil}$ PVC film coated with a $1.5 \text{ mil}$ permanent acrylic adhesive, backed by a sturdy $90 \text{ pound}$ liner.

Why PVC? Polyvinyl Chloride (PVC) is the industry standard for most decals and signage because it’s flexible, accepts various printing methods well, and cuts cleanly on standard cutting plotters. The $18 \text{ mil}$ thickness gives the decal substance and durability—it’s not a flimsy sticker.

The film's adhesive is robust: a strong, permanent acrylic formula (ADH0029) that bonds reliably to clean, flat indoor surfaces. While you wouldn't use this for heavy-duty floor applications, it’s ideal for:

  • Retail window graphics that glow after sunset.

  • Temporary wall murals or themed displays.

  • Decals and branding where you want a unique visual signature.

This specific construction makes the film easy to handle and apply, which is crucial for quick-turnaround promotional work.


Creative Applications: Making Your Message Pop

The real fun starts when you think outside the safety box. If the product's primary feature is a cool, short-duration glow, how do you use that to grab attention?

1. Event and Entertainment Signage

Picture a dimly lit convention center, a haunted house attraction, or a nightclub entrance. Standard signage fades into the background. Using Glo Brite 7901 Promotional Grade PVC for directional arrows, themed decals, or booth borders instantly sets your design apart. When the main stage lights dip or the room is dimmed, your message suddenly becomes the brightest, most visible element.

Real-world context: A museum curator I know used this exact type of film to create "hidden" path lines in an exhibit. When the main exhibit lights dimmed for a historical display, the glow lines became visible, guiding the audience's eyes toward the next artifact in the dark. It was dramatic, effective, and temporary.

2. Custom Decals and Branding

Think about high-end product branding. Manufacturers are always looking for a unique touch. This photoluminescent film is perfect for small, branded decals applied to laptops, tools, helmets, or even promotional giveaways. Hand out a branded decal that actually glows in the dark, and you instantly elevate the perceived value far beyond a basic sticker.

3. Kids' Products and Themed Rooms

The short, fun glow duration of about an hour is actually perfect for children’s products. It’s ideal for decals used in themed bedrooms, on toys, or as fun, visual accents. The glow is bright when the lights go out, fades as the child falls asleep, and isn't so powerful that it keeps them awake.


The Technical Reality: Expectations Versus Code

Here is a critical point that any professional must understand: Glo Brite 7901 Promotional Grade PVC is not meant for fire safety code applications.

If you are dealing with building codes (NFPA 101, IBC, IFC), you must use UL-listed films engineered for long-term, high-luminance performance. This promotional grade film does not meet those requirements.

Why is this important? Because it manages client expectations and budgetary decisions. You use the affordable, promotional film for the decorative signs inside a gaming cafe, but you must use the specialized, heavy-duty film for the emergency egress path behind the counter. Knowing the difference ensures you avoid serious legal and compliance trouble down the road.

If a client needs a decal that glows brightly for $10$ minutes (when the light hits $13.3 \text{ mcd/m}^2$), this product is perfect. If they need a film that maintains visibility after $90$ minutes, you need to step up to a different, higher-performing, and more expensive product line.


Mastering the Material: Insider Tips for Sign Shops

Working with photoluminescent film requires a few adjustments compared to standard vinyl.

Color Saturation: Because this film glows, its base color in the daytime is a pale greenish-yellow. Here’s a crucial tip: If you hit it with heavy, opaque ink, you’re basically putting a dark blanket over it—that blocks the light from charging the glow particles! You should stick to translucent inks, or just leave certain design elements completely unprinted. That's the only way to maximize the actual glowing effect.

Surface: Seriously, make sure the surface you’re sticking this to is clean, totally dry, and flat before you even think about laying the film down. This $18 mil film is incredibly tough, but you need that clean surface to guarantee that $1.5 mil of adhesive forms the strongest possible bond.

Final Word: Safety Grade Quality, Promotional Grade Price

The ability to integrate a reliable, non-electric light source into your signage and decal projects is a massive creative advantage. The Glo Brite 7901 Promotional Grade PVC film gives you the quality manufacturing and reliable adhesion of an industrial product, but at an economical price point tailored for decorative and promotional impact.

It’s about making a clear, conscious choice: stop paying for safety features you don't need in a decorative setting. Start investing in a film designed specifically for flair, creativity, and visual appeal.

Ready to light up your next project with a guaranteed, high-impact glow? Contact our media experts today to explore custom sizing and bulk ordering options for Glo Brite 7901 Promotional Grade PVC film, and discover how easy it is to add that unique pop to your decals and signs.

2025-09-12 17:13:00

Why Checkerboard Sheets Beat Basic Black Grip Tape

Look around at the local park or check out the latest decks online. What do you see? Ninety-nine percent of the time, it's just plain, standard black grip tape. It works, sure. It gets you from point A to kickflip.

But for dedicated skaters, your board is more than just a tool. It's an extension of your style, a canvas for your personal brand, and frankly, a statement about who you are. "Just doing the job" isn't really the point.

That’s exactly why Checkerboard Sheets have become so popular.

This isn't a cheap novelty. It’s the perfect collision: an iconic, instantly recognizable design aesthetic meets the absolute peak of grip performance. If you respect the roots of the culture but refuse to blend into the black background, you absolutely need to understand what these unique Checkerboard Sheets bring to your ride. You get to make your deck truly pop, all without having to compromise on that rock-solid, trusted Jessup feel under your feet.

Let's drop in and look at why this bold design is more than just a look; it's a smart choice for both performance and personal expression.

The Enduring Allure of the Squares: A Timeless Statement

You have to admit it, that checkerboard look demands attention. The checkerboard pattern carries some serious cultural weight. It’s not just some random design trend we cooked up last week. It’s been a symbol of rebellion, sharp contrast, and speed for generations—think about those classic punk rock album covers, the sharp look of the ska movement, or the racing flags at the finish line. That pattern is essentially shouting your confidence.

When you lay down Checkerboard Sheets on your deck, you’re doing more than adding grip; you’re buying into that rich, rebellious history. You’re choosing an aesthetic that has always been about making noise without saying a word.

It’s the simplest way to tell everyone: "I know where this culture came from, but I'm carving my own line."

This decision isn't about being flashy just to get noticed. It's about using a strong, classic visual to infuse your entire setup with personality. It makes your connection—how you ride, what you ride, and who you are—instantly recognizable. Your board becomes a unique signature at the park.


ULTRAGRIP Performance: Style Without Sacrifice

Here’s the part that matters most: while the checkerboard pattern is undeniably cool, it’s built on the legendary Jessup ULTRAGRIP™ core. This means you get all the visual impact without having to give up an ounce of essential performance.

You might be thinking, “Wait, doesn’t the pattern mess up the grip?” That’s a completely fair question. The genius of these Checkerboard Sheets is that the pattern is seamlessly integrated into the same high-traction grit formulation that skaters across the globe have depended on forever.

What does that mean for your riding?

Reliable Foot Lock: You get that secure, stuck-in feeling—which, as you know, is absolutely vital for control. Whether you’re setting up for a quick kickflip, committing to a heavy rail slide, or just trying to navigate some sketchy back street, ULTRAGRIP makes sure your feet are glued right where you need them.

Precision Flick: Popping an ollie or flicking for a tre-flip demands instantaneous, consistent friction against the edge of your shoe. The carefully tuned grit formulation allows for responsive, immediate movements, which translates directly into more confidence during difficult tricks.

Durable Consistency: This isn't a fragile design that rubs off. The pattern is part of the long-lasting, durable grit itself. You’ll maintain that crisp, responsive feel and consistent traction day after day, session after punishing session.

So yes, the pattern looks incredible, but the ULTRAGRIP™ beneath it guarantees it performs like the professional standard that it is. You genuinely get the best of both worlds.


Ease of Application: Less Garage Time, More Skate Time

No one wants to waste a perfect afternoon fighting their grip tape. You want a clean, smooth application process so you can get rolling immediately. That's another area where Jessup’s quality commitment stands out, even with these specialized designs.

These Checkerboard Sheets use the same straightforward application process that has made Jessup the industry favorite.

No Bubble Trouble: The advanced adhesive backing is engineered for smooth, flawless application. This is crucial for maintaining consistent grip—a bubble isn't just ugly; it’s a distraction that throws off your balance. It lays flat, stays smooth, and stays put.

Effortless Trim: The high-quality silicon carbide grit cuts cleanly and predictably. This makes trimming the excess surprisingly easy, giving you those razor-sharp, clean edges that make your deck look completely dialed in.

It’s Not Going Anywhere: Once you get it bonded, consider it permanent. That powerful adhesive literally creates a tenacious connection with your deck, so it shrugs off peeling and lifting, even after rough landings, damp sessions, and months of heavy use. It stays put.

The payoff is simple: you spend less time frustrated in the garage and much more time perfecting your skills at the spot.


More Than Just Grip: Enhancing Your Deck’s Personality

Think about the first time you ever saw a truly custom deck. It instantly grabbed your attention. It told you what kind of skater you were looking at before they even dropped in. Checkerboard Sheets offer that immediate visual pop, giving your deck a unique personality that goes far beyond the graphics on the bottom layer.

Visual Pop: Against any backdrop, the strong black and white checkerboard stands out immediately. It beautifully frames your trucks and wheels, making your entire setup feel cohesive, dynamic, and totally intentional.

Customization Base: For riders who love adding stickers, stencils, or other personal touches, the checkerboard provides a strong, bold base layer. It compliments and enhances other customizations rather than getting overwhelmed by them.

Retro Vibe, Modern Tech: This design successfully merges a classic, retro aesthetic with cutting-edge grip technology. You're not just riding a board you bought off the rack; you’re making a statement about appreciating skate history while still demanding uncompromising modern performance.

It all comes down to creating a setup that is a genuine reflection of you. It's about taking pride in every detail of your board, right down to the surface your feet connect with.


Why Jessup is the Name You Trust

For decades, Jessup has been the gold standard for reliable grip tape. There's a fundamental reason why pros and weekend riders come back to it time and again: the consistency, the sheer durability, and that perfectly responsive foot-to-board feel.

These Checkerboard Sheets share that same DNA. You’re not rolling the dice with an unknown brand hoping the cool look holds up. You are getting the exact same trusted Jessup grip, just presented in an iconic, personality-packed pattern. It is the ultimate reassurance that choosing a bold style will never compromise the fundamental control you rely on.

That commitment to quality means: consistent manufacturing, proven resistance to tearing and wearing out, and totally reliable performance, session after session.

It’s the peace of mind that comes from knowing you’re riding with the best, but doing it entirely on your own terms.


Ready to Roll with a Statement?

In a world full of standard, blend-in boards, your deck deserves to speak for itself. Checkerboard Sheets give you that unique opportunity: bold style meets peak ULTRAGRIP performance. It gives your ride a strong retro vibe and makes your setup pop with personality.

Why settle for generic grip tape when you can infuse your deck with character, without ever sacrificing the uncompromised grip you need for every ollie, every grind, and every cruise? It's time to choose a grip tape that fully matches your style and fuels your performance.

Ready to give your deck that iconic look and the trusted ULTRAGRIP™ feel? Explore our Checkerboard Sheets today and discover how Jessup is pushing the boundaries of skate style and performance.

2025-09-08 15:50:00